Adding and Importing Calendars
When you start using Daylite for the first time, the calendar is a blank slate, waiting to be filled. You probably have schedules full of meetings, appointments and time blocked off for work, all of which are currently in other calendars, and all of which need to be imported into Daylite.
Before you learn about Daylite's powerfully integrated calendar functions, you will need to turn on Calendar Integration in Daylite. This way, you can view all of your calendars from other applications in Daylite, and also let other calendar applications view your Daylite calendar entries.
Showing Other Calendars in Daylite
The ability to show all of your calendar entries from other apps is one of the great integration features of Daylite. Follow these steps to get started.
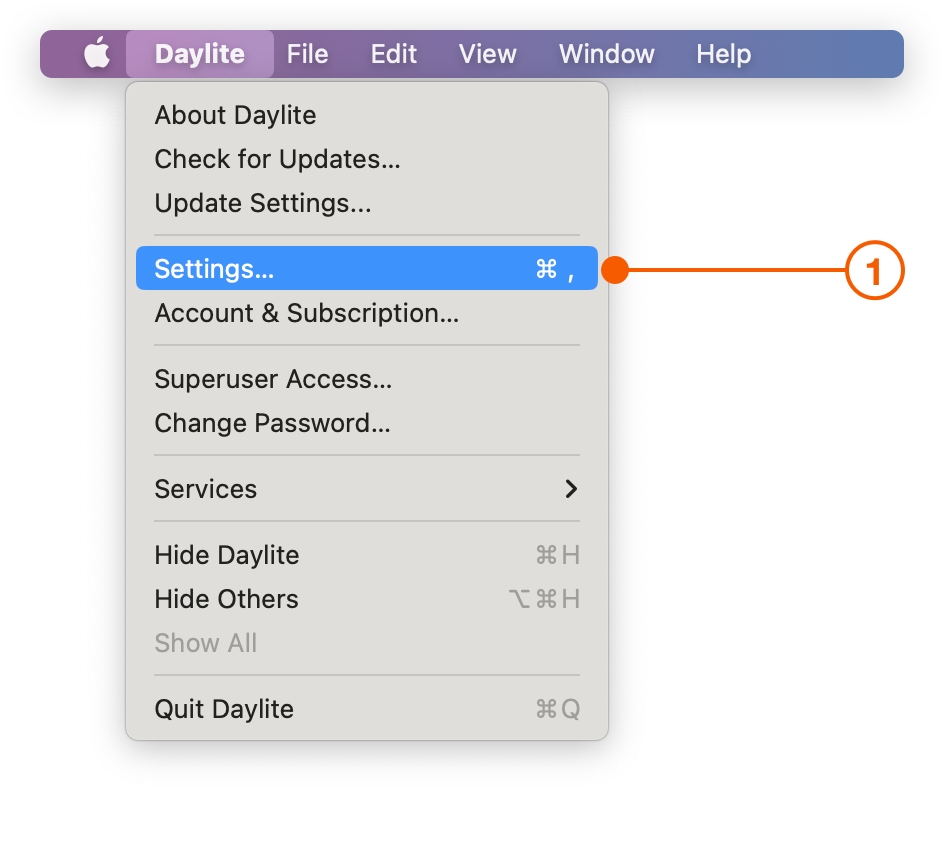
Open Daylite and select Daylite > Settings.
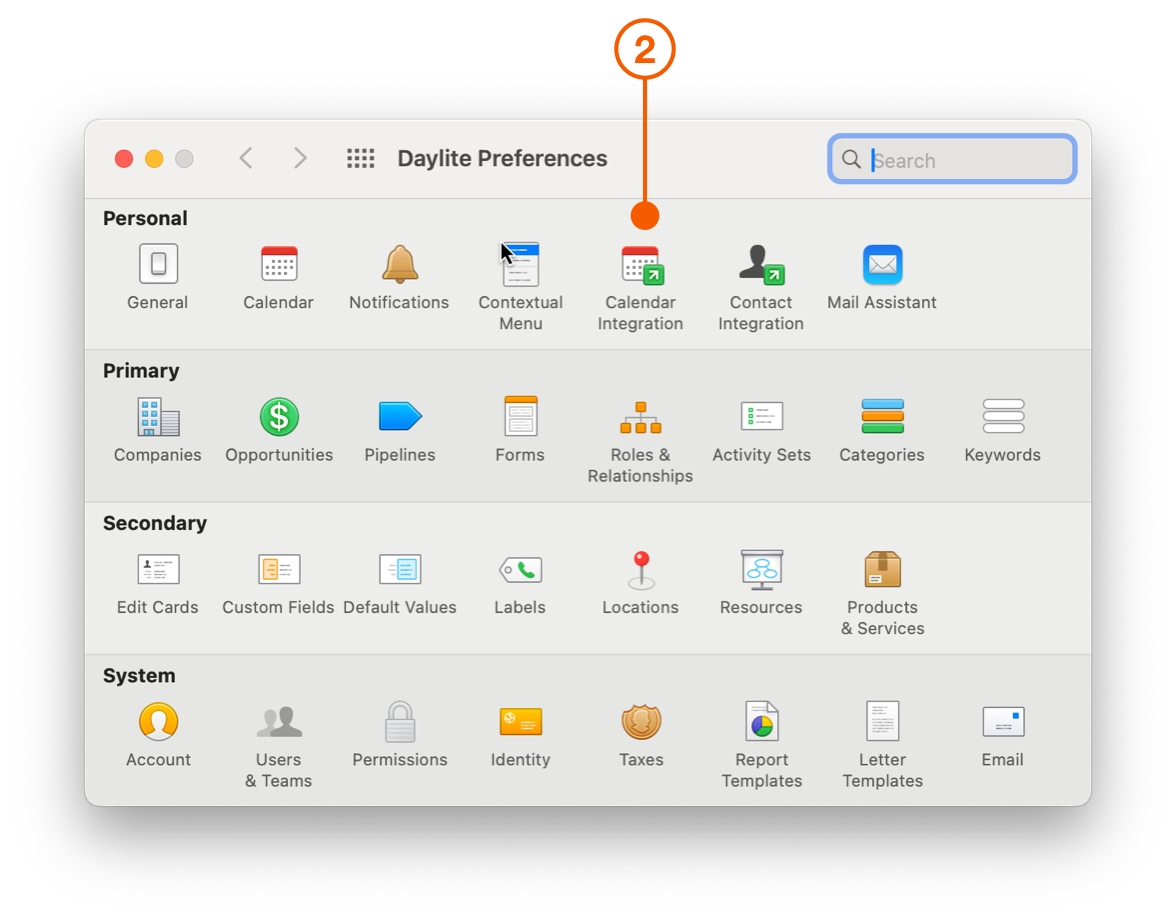
Select Calendar Integration.
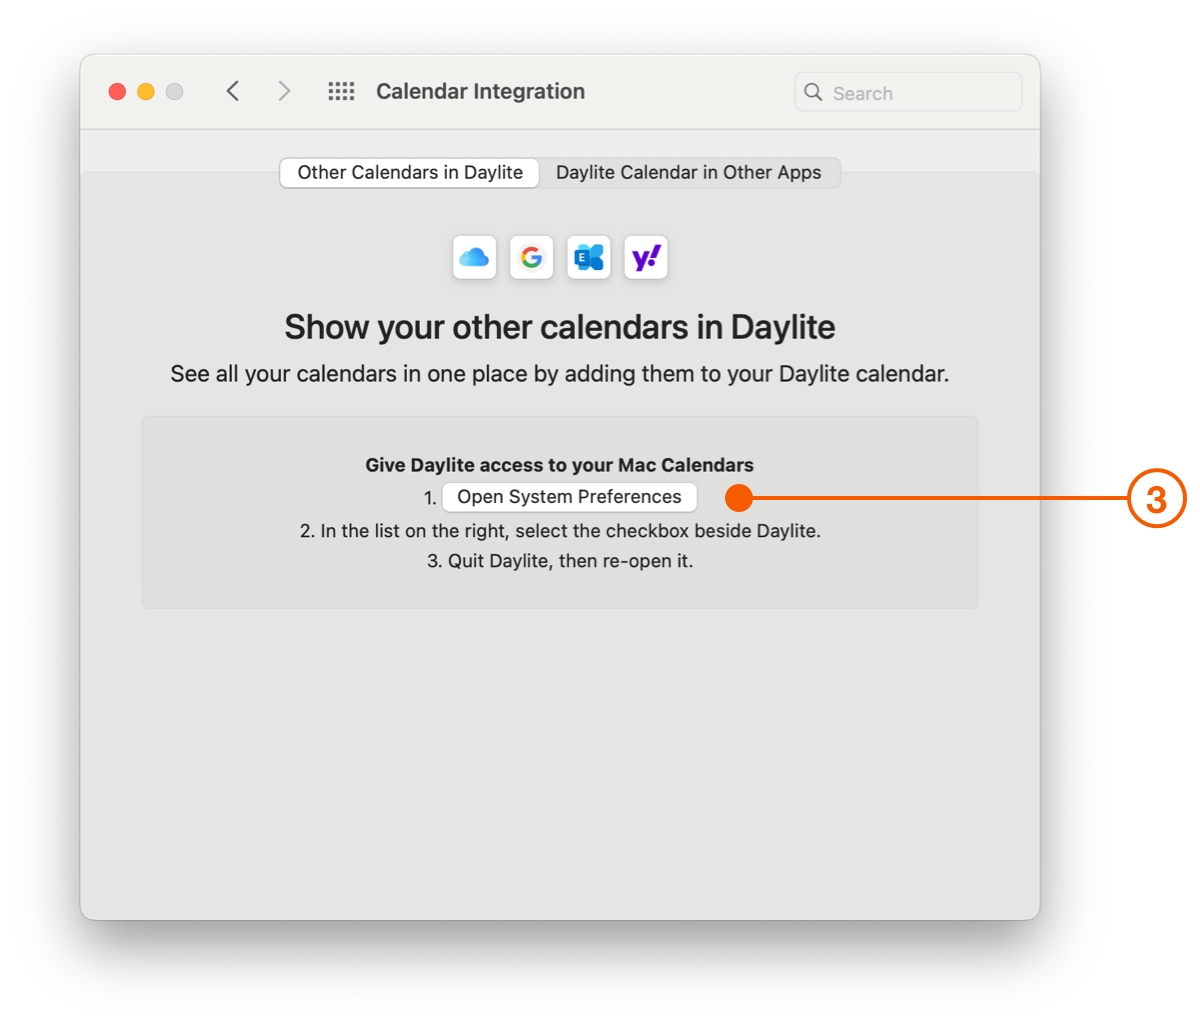
Follow the instructions to give Daylite access to your other calendars.
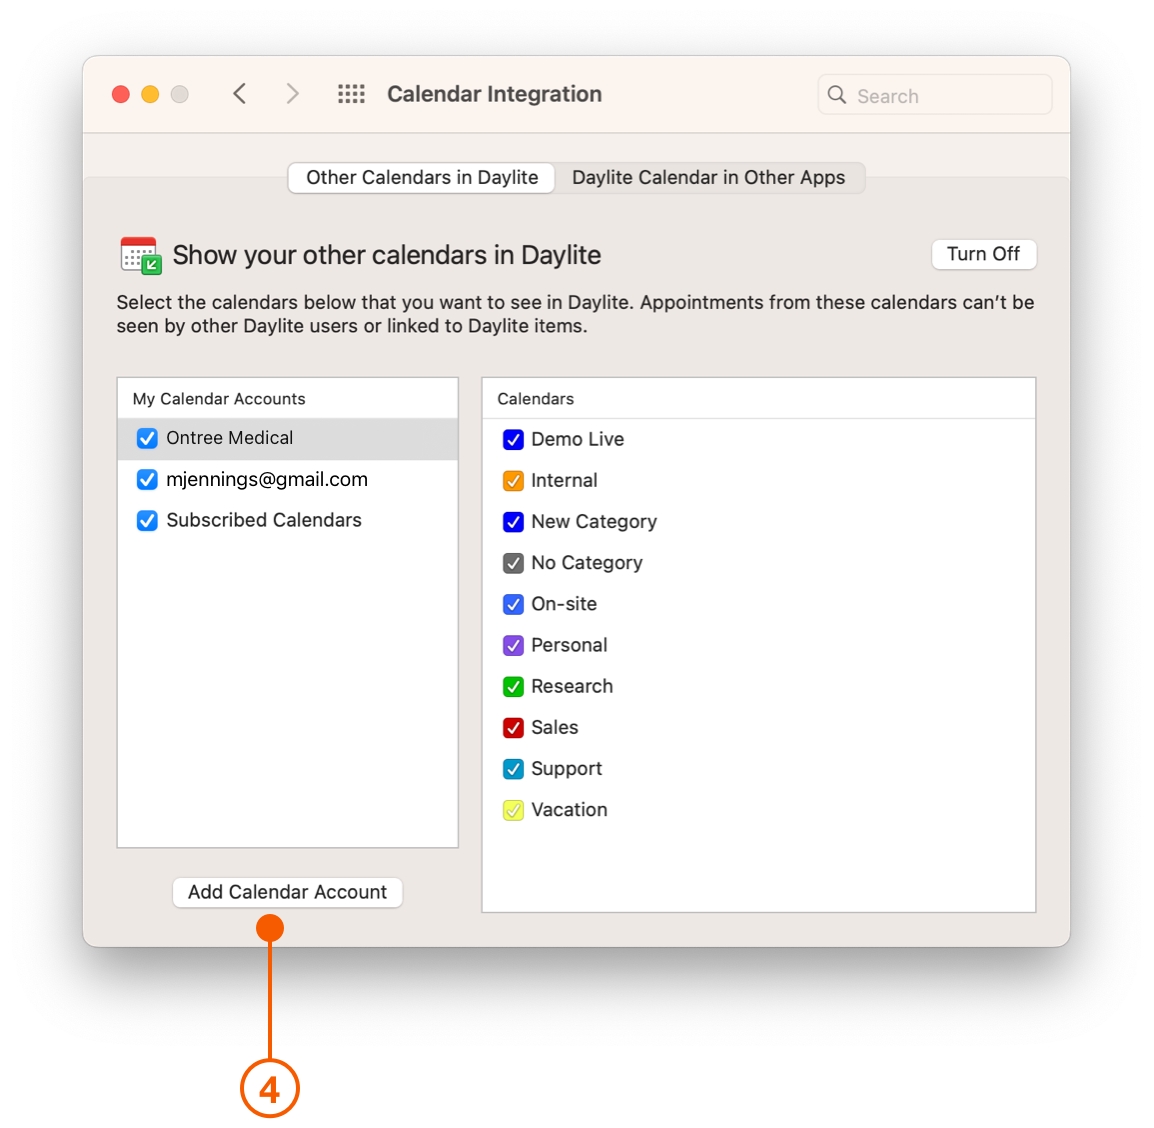
Click the Add Calendar Account button to add optional calendars from other applications, such as Apple or Google.
Viewing the Daylite Calendar in Apple Calendar
Follow these steps to view Daylite's Calendar in Apple's Calendar app.
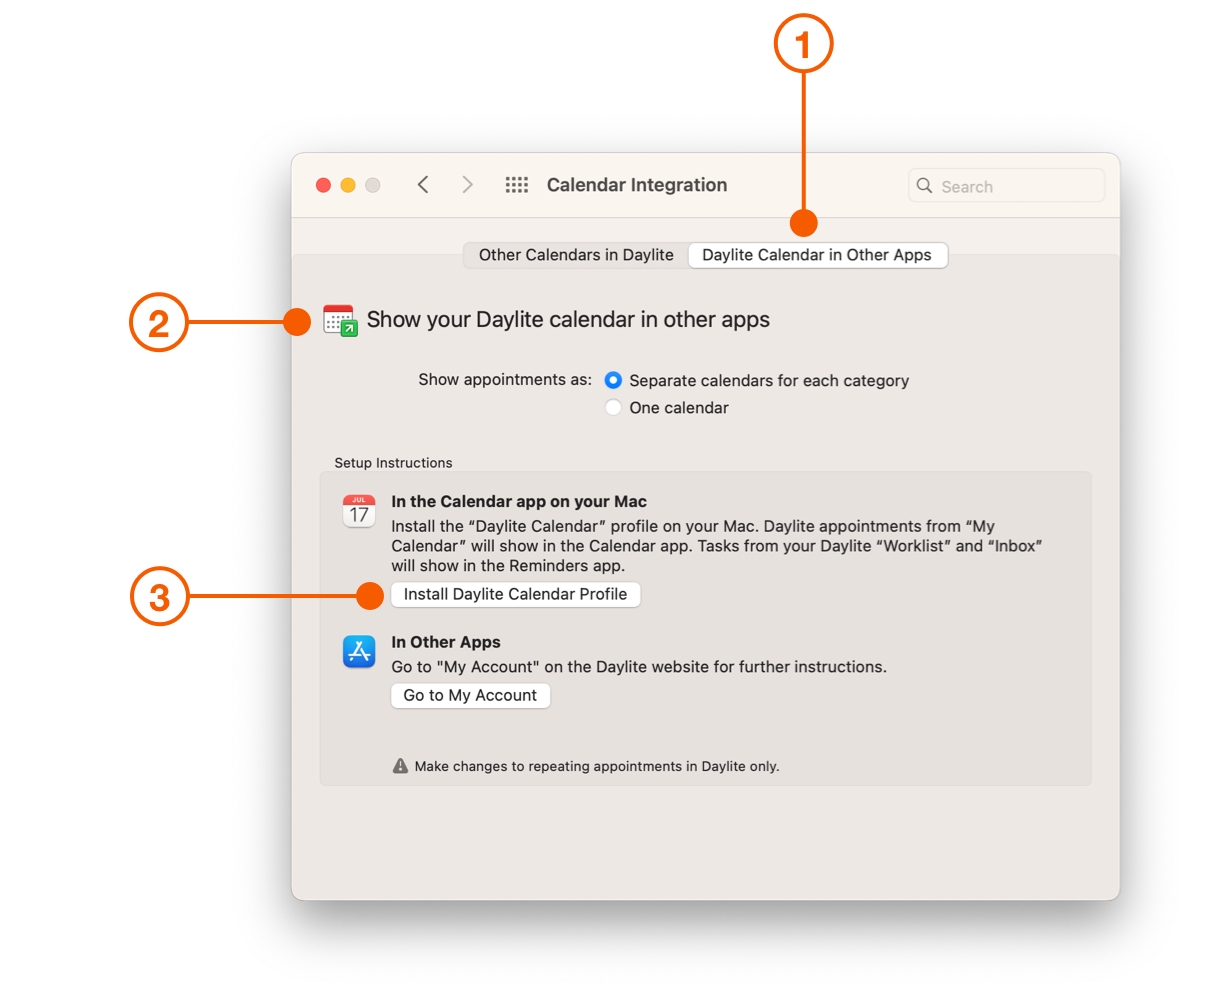
Select the Daylite Calendar in Other Apps tab.
Select Show your Daylite calendar in other apps and how you wish to view your appointments.
Click Install Daylite Calendar Profile.
If you would like to view Daylite's calendar entries in other calendar applications, you can click Go to My Account under In Other Apps.
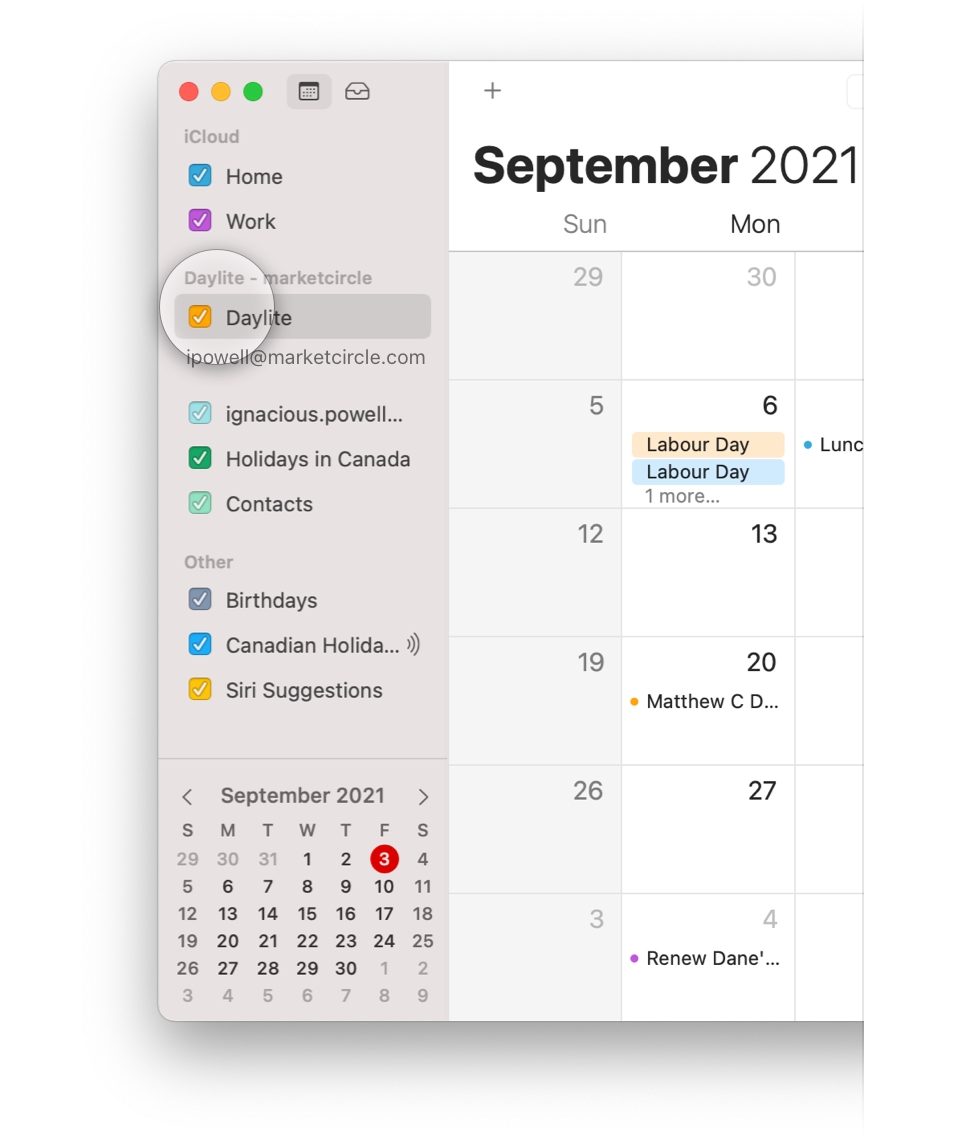
As you can see in the screenshot below, Daylite has successfully been added to Apple Calendar.
Congratulations, you have just set up Daylite's Calendar Integration.
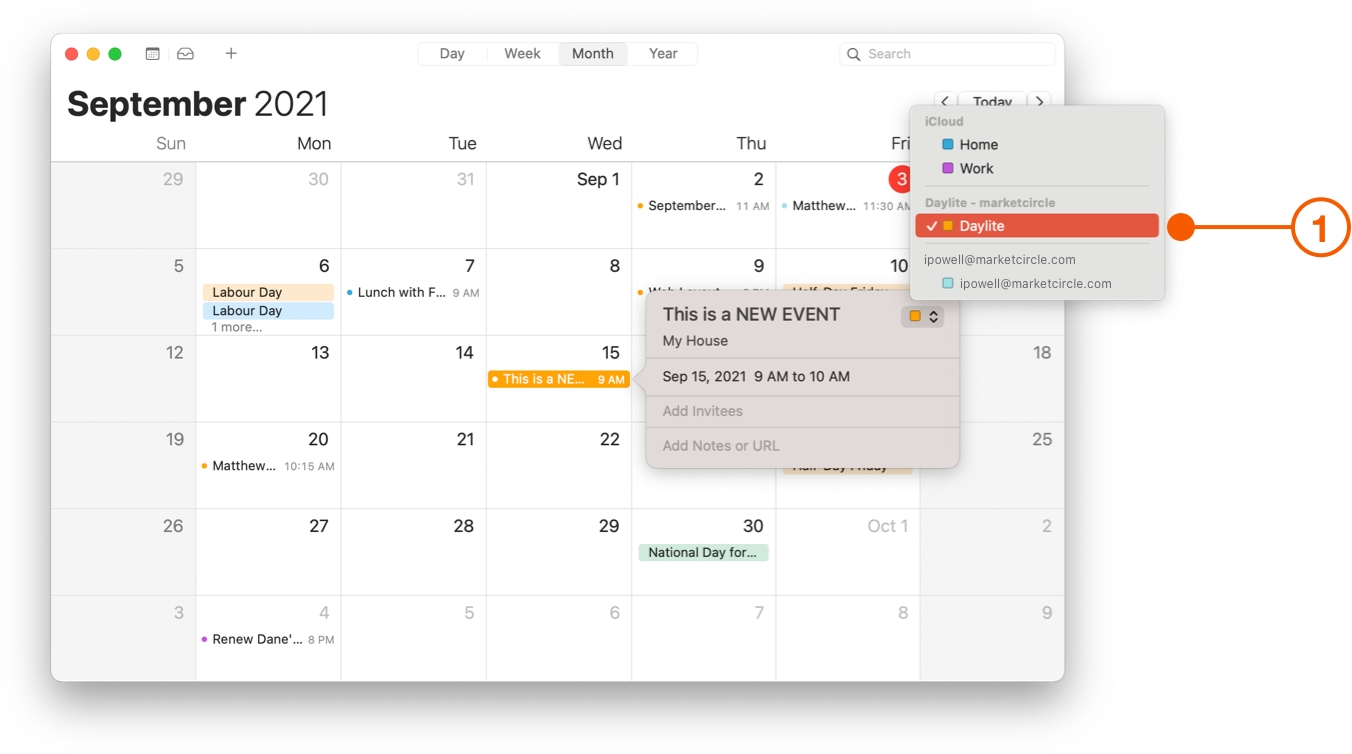
Now, when you create a new event in Apple Calendar, you will see Daylite as an option.
Importing from your Apple Calendar into Daylite
Apple Calendar is a familiar app for anyone using a Mac, and where many people will have their calendar stored. You can import your schedule from Apple Calendar to Daylite Calendar in a few easy steps.
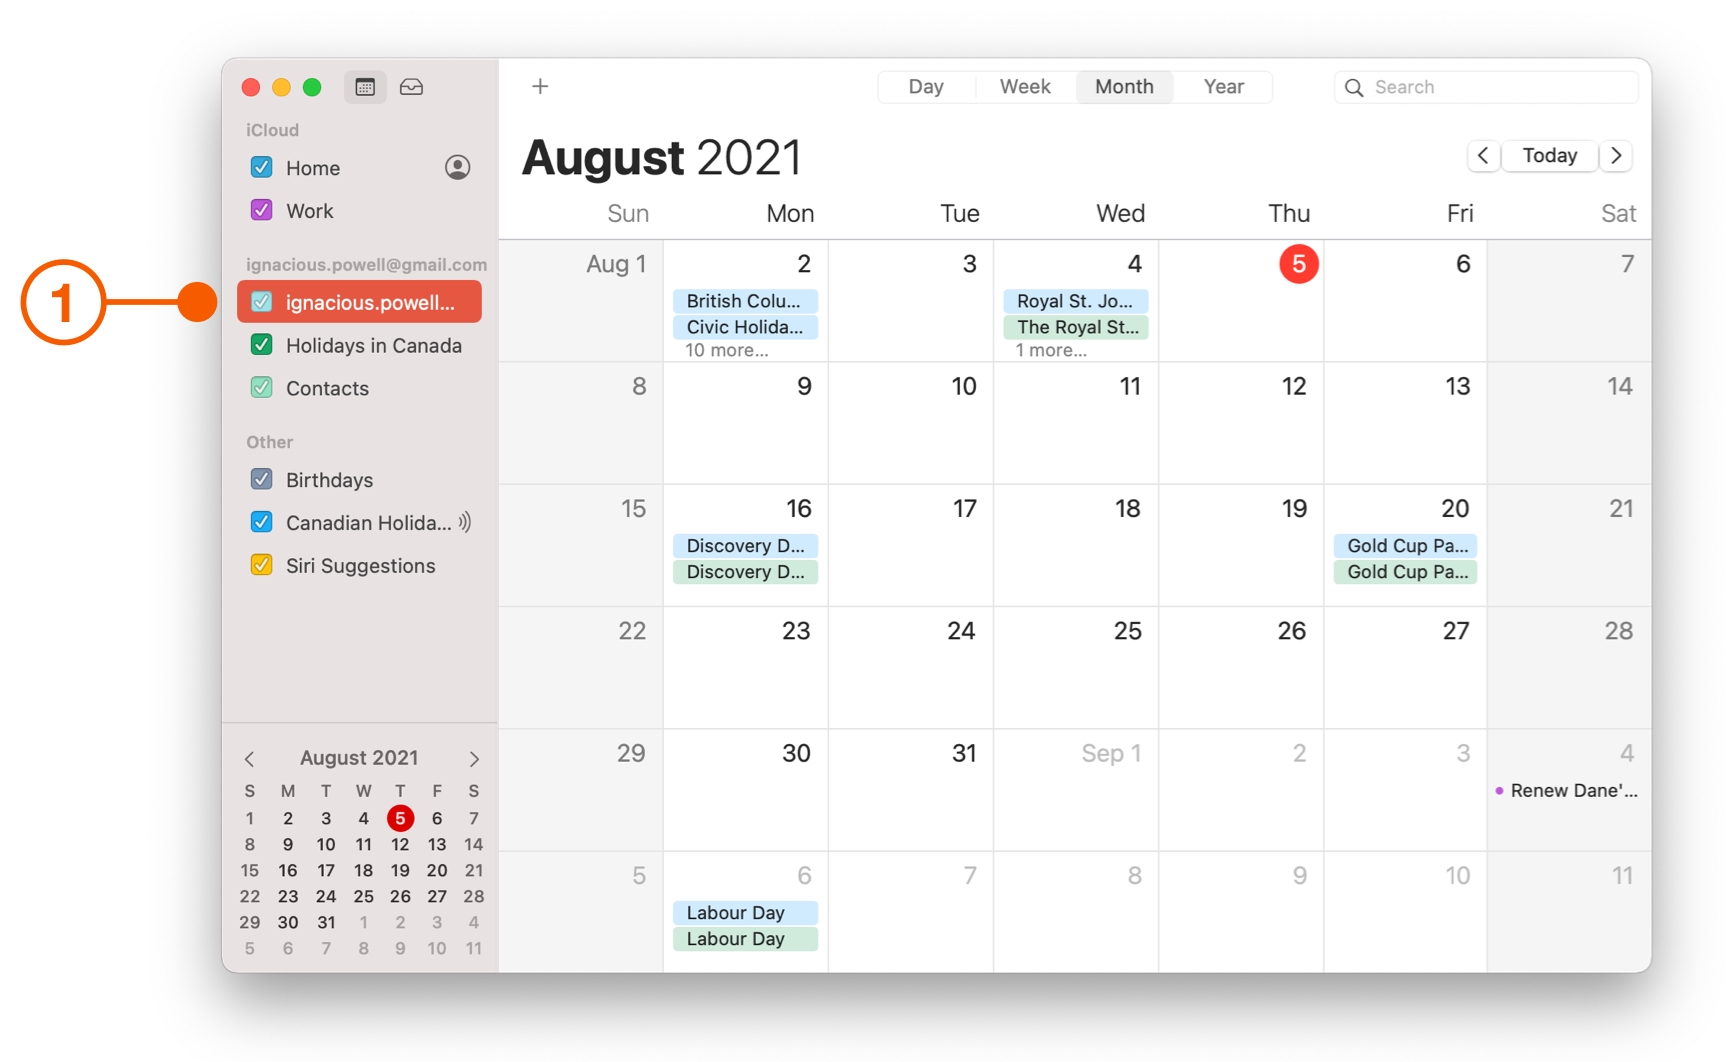
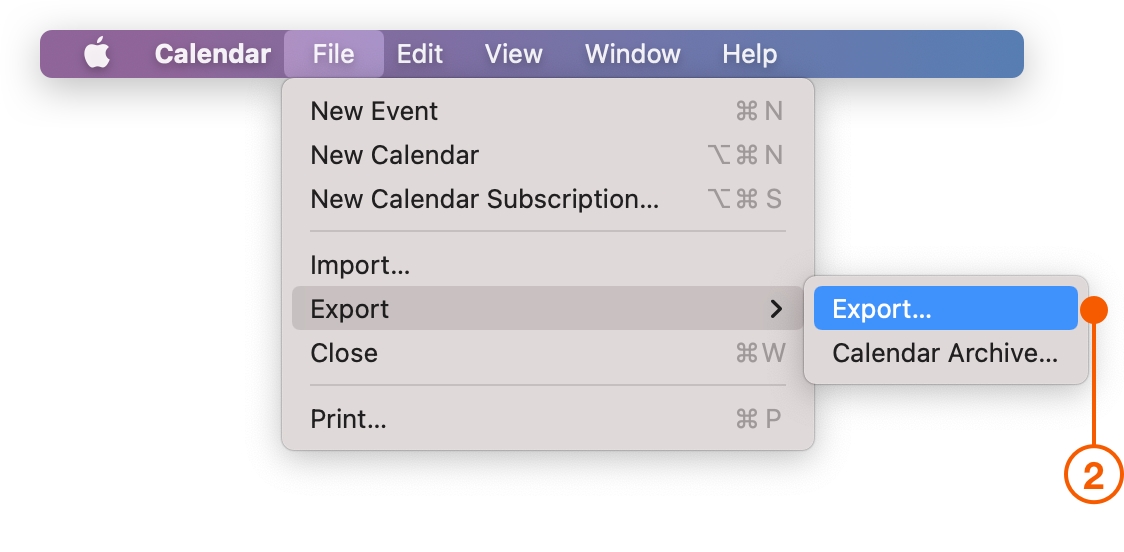
Open Apple Calendar and select the calendar or calendars you want to export.
Click File > Export > Export.
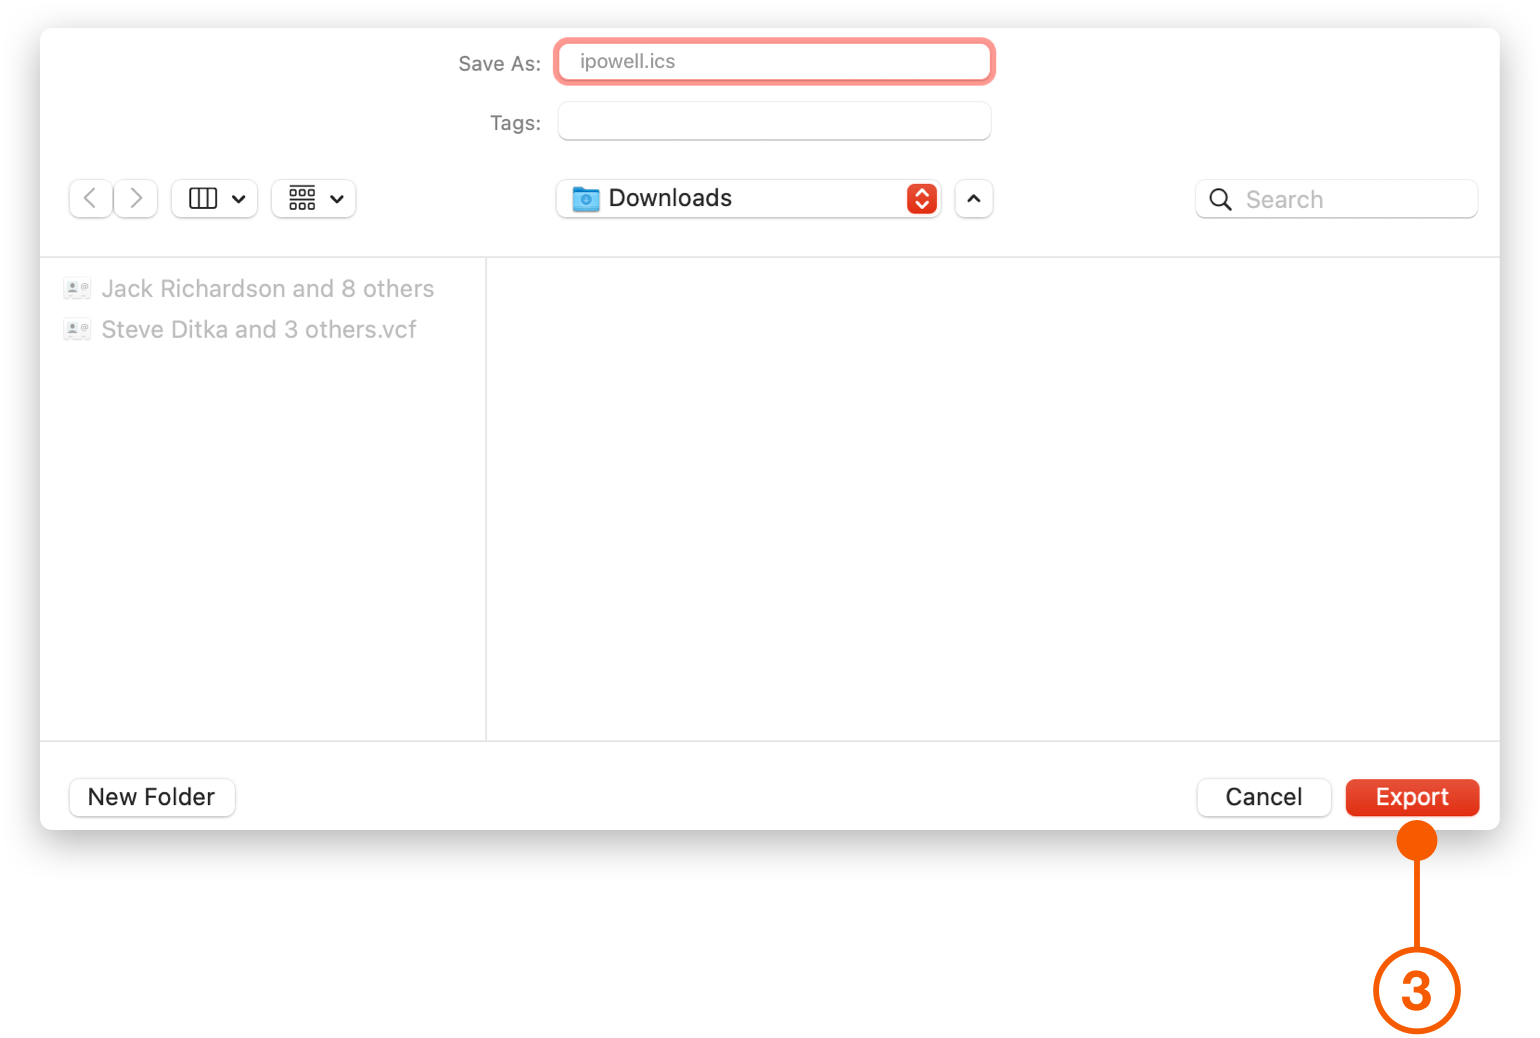
The .ics file will export to the Download folder by default. Click Export.
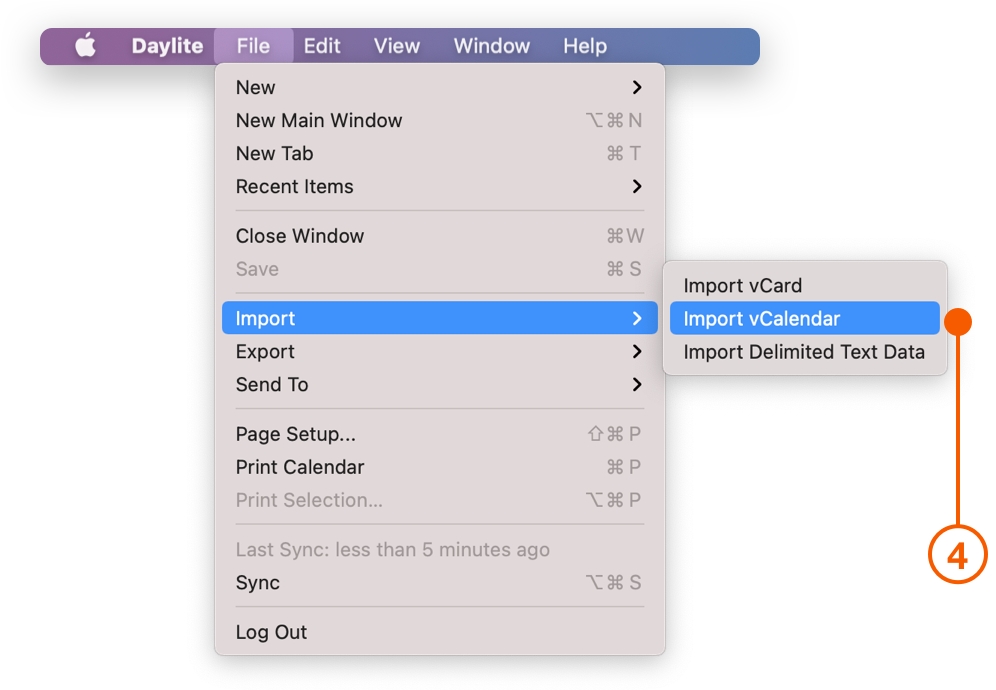
Open Daylite and click File > Import > Import vCalendar.
Select the .ics files you want from the Download folder and click Open.
Importing From Google Calendar into Daylite
Google Calendar is a popular calendar app and gives you the option to export all your calendars as .ics files, which can be used to import into Daylite.
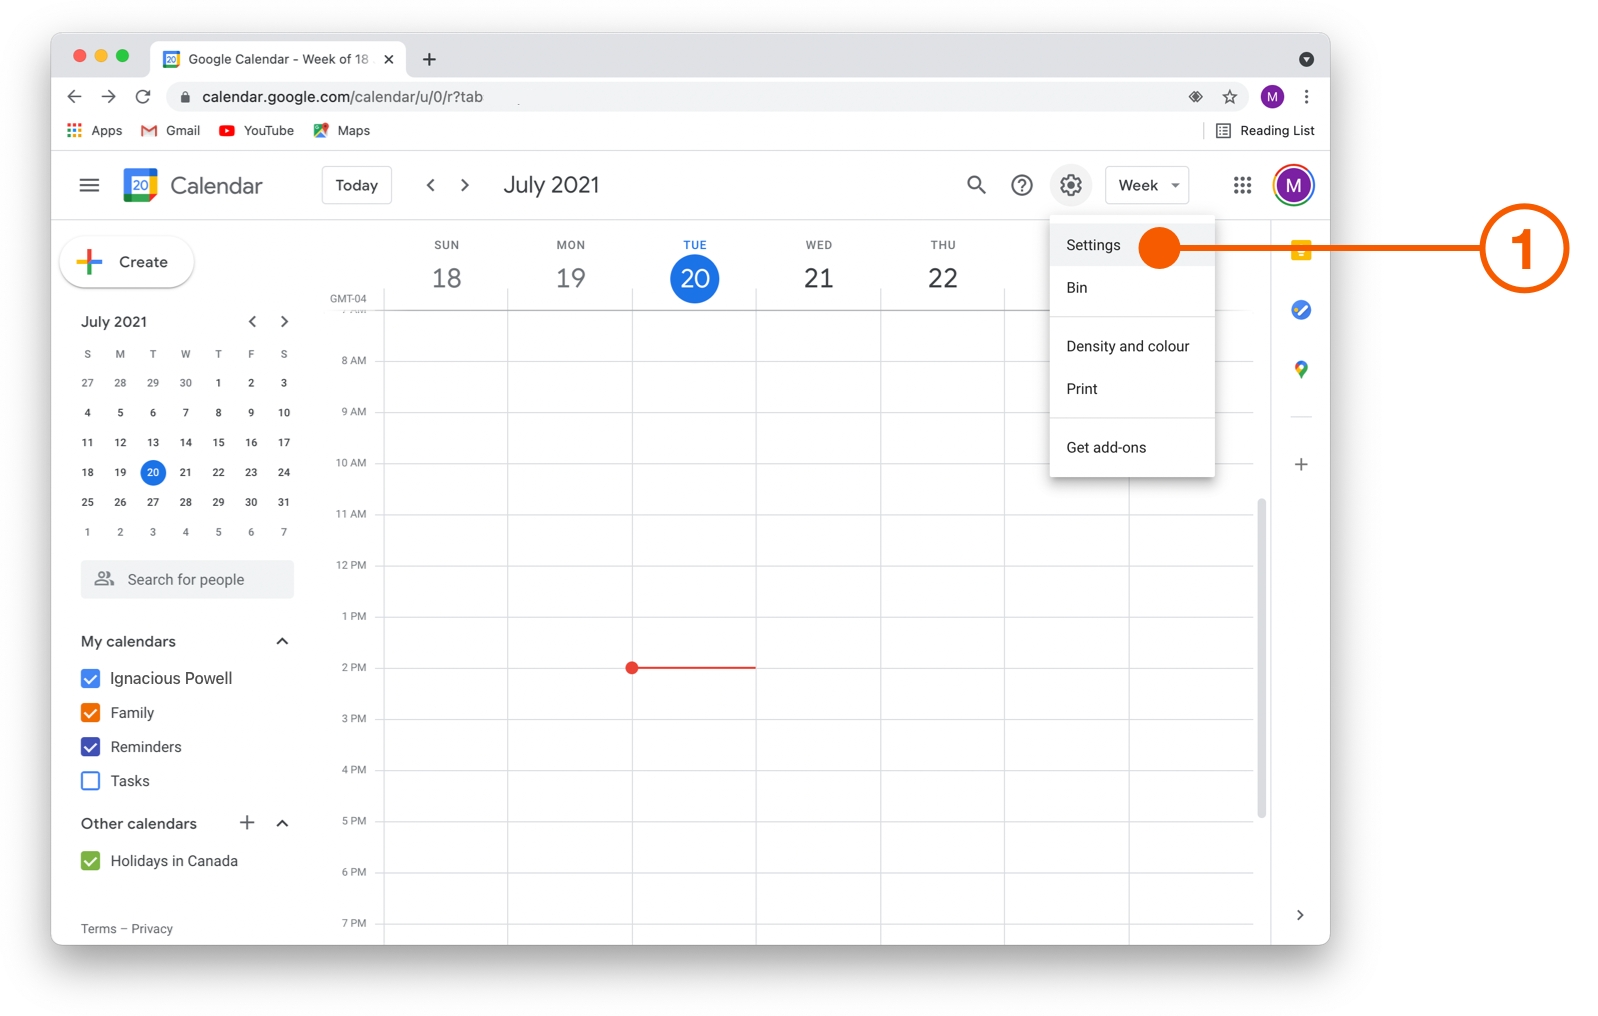
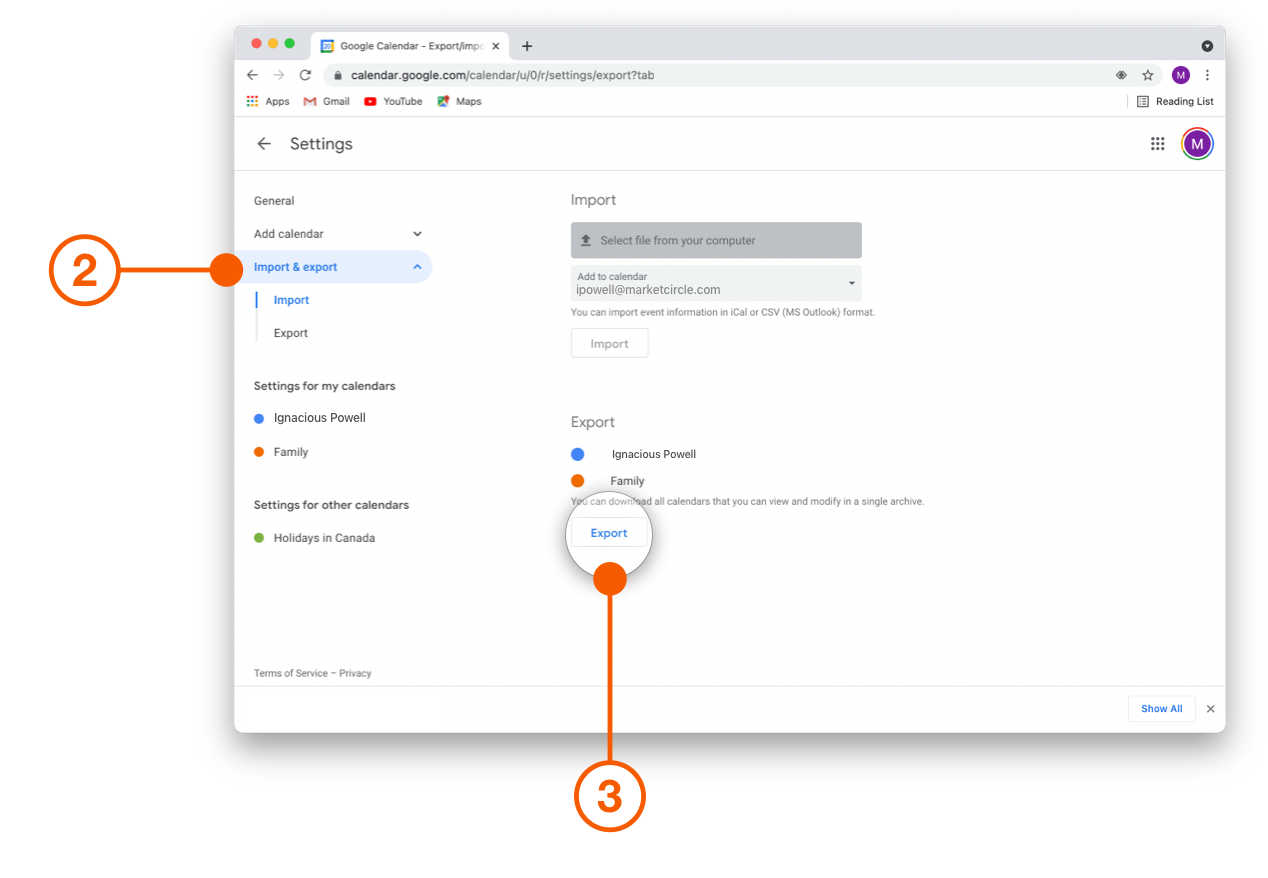
Open Google Calendar and click Settings.
Click Import & export and select Export from the drop down menu.
Select the calendars you wish to export and click Export. A ZIP file will be downloaded to your computer. If you open the ZIP file, you'll see individual .ics files for each of your calendars.
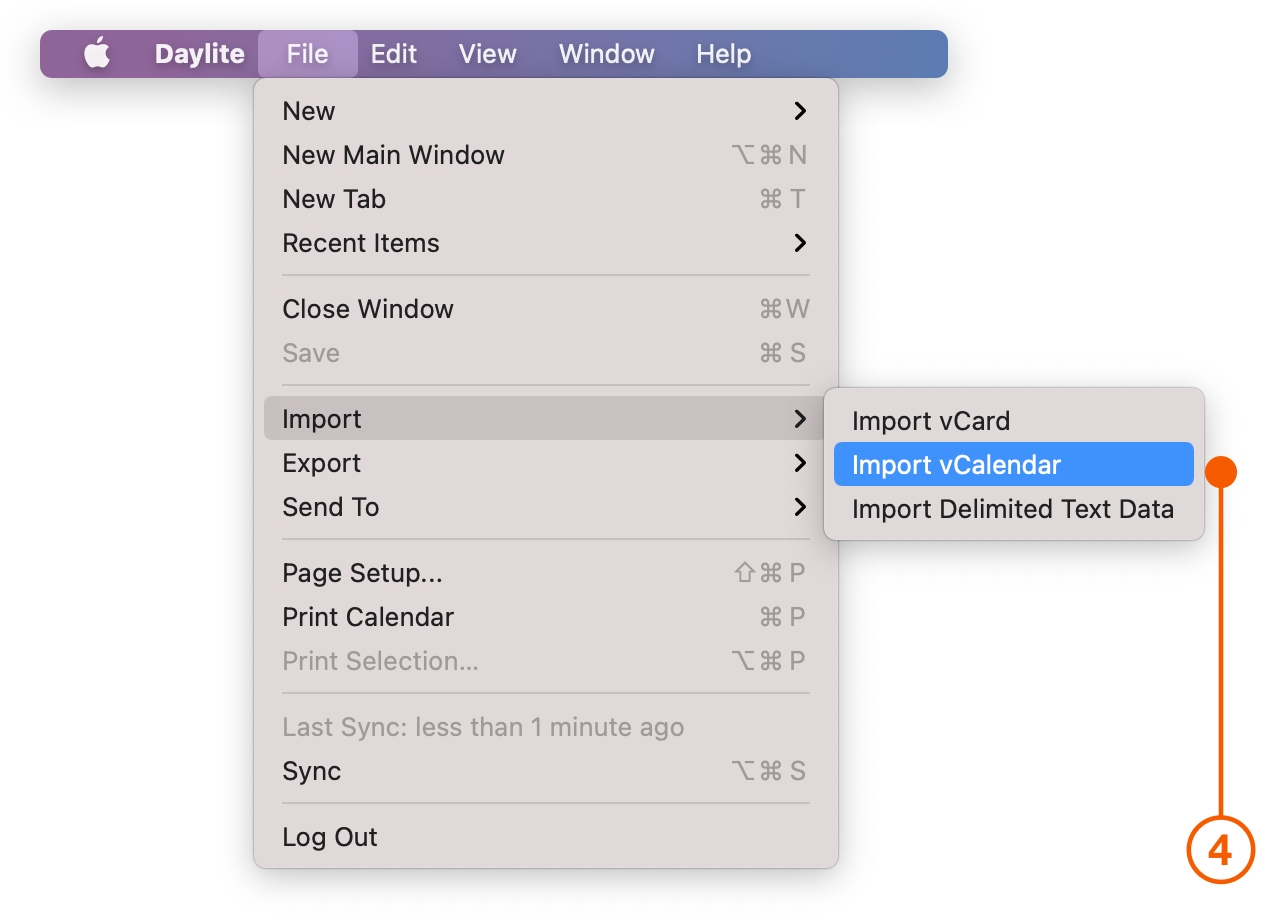
Open Daylite and choose File > Import > Import vCalendar.
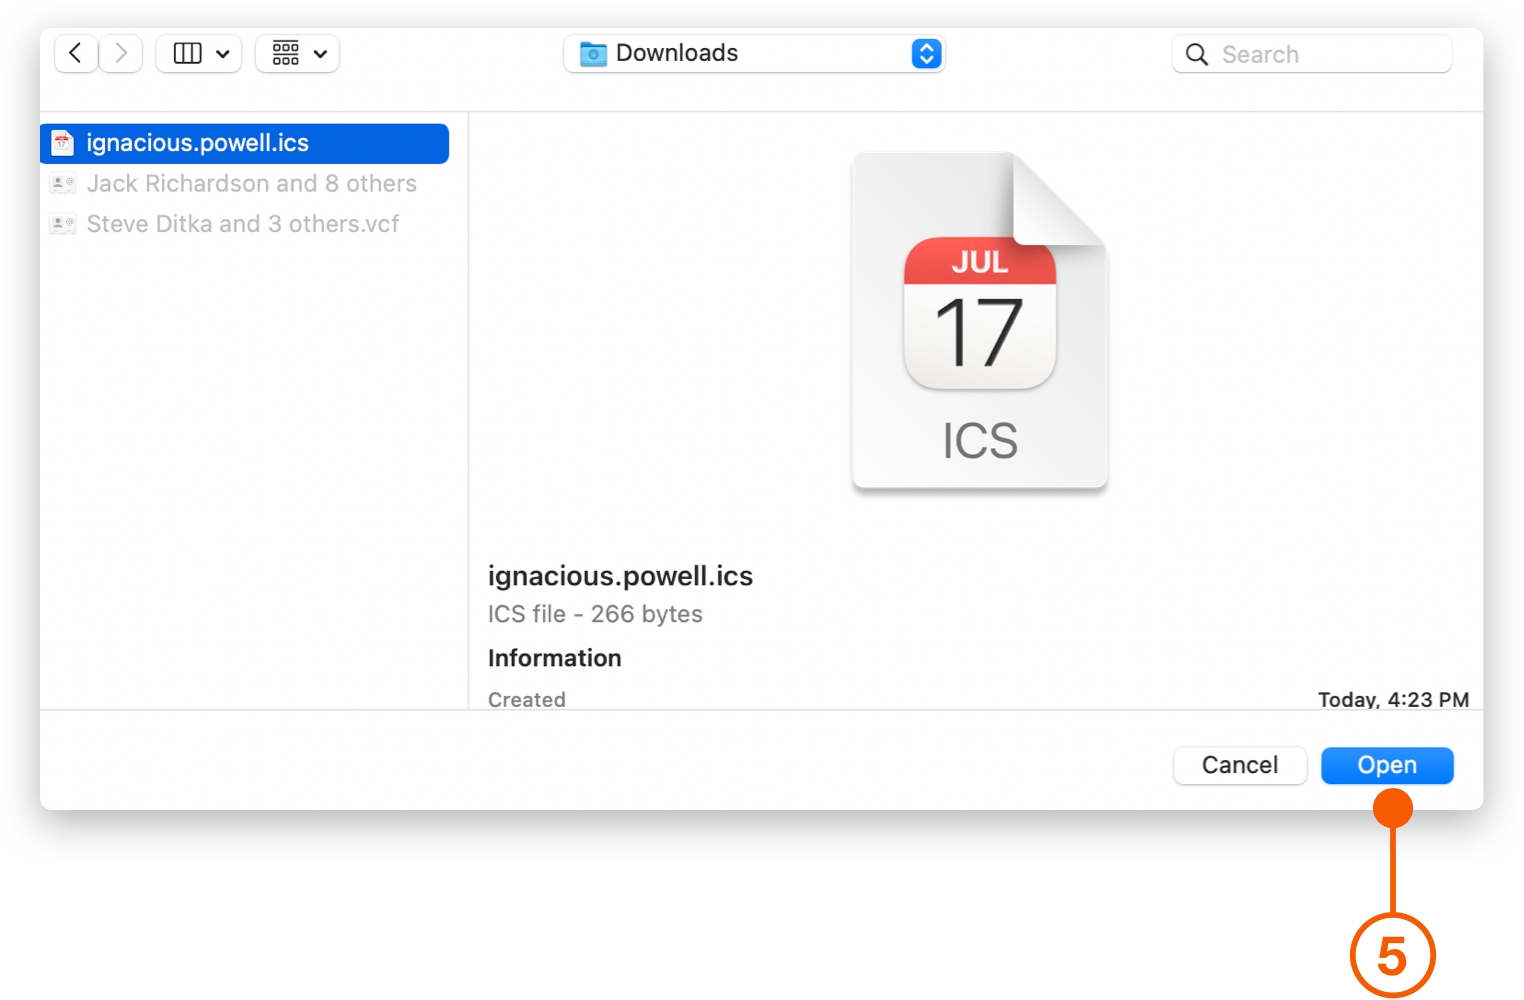
Select the .ics file and click Open.
Select a Daylite category to match the Calendar from Google.
For multiple calendars repeat steps 6-8 until all your calendars are imported.
Importing From Other Calendar Apps into Daylite
Most calendar applications, like Outlook Calendar or Fantastical, let you export your events.
Open the calendar application where your events are currently stored.
Look for an option to Export.
If you're given the option to choose from different file formats, choose .ics.
Open Daylite.
Choose File > Import > Import vCalendar.
Select one of the .ics files and click Import.
Match the Daylite category to the Calendar you imported.
For multiple calendars, repeat steps 5-7 until all your calendars are imported.
Wrap Up
With your calendar in the same place as everything else, you don't need to jump around from app to app. Now you can focus on your work and let Daylite remember the details for you. Keep up the momentum and add your calendar to Daylite, then start sharing your Contacts and Calendar with other apps.
Last updated