Starting a New Project
Every single book author will tell you the first page is always the most difficult. It's a blank slate, just waiting for you to fill. It can be scary, but it can also be exhilarating. Starting a new project might feel the same way at first, but Daylite makes it easy.
Whether deliverables for customers or internal initiatives, Daylite helps you execute on your plans by keeping everything in one place.
Starting A New Project
There are a few different ways you can create a new Project in Daylite, depending on where you are in the app.
First let's look at different ways you can start creating a Project, and then we will walk through filling in the details and look at what you can customize.
Starting A New Project from New Item Button
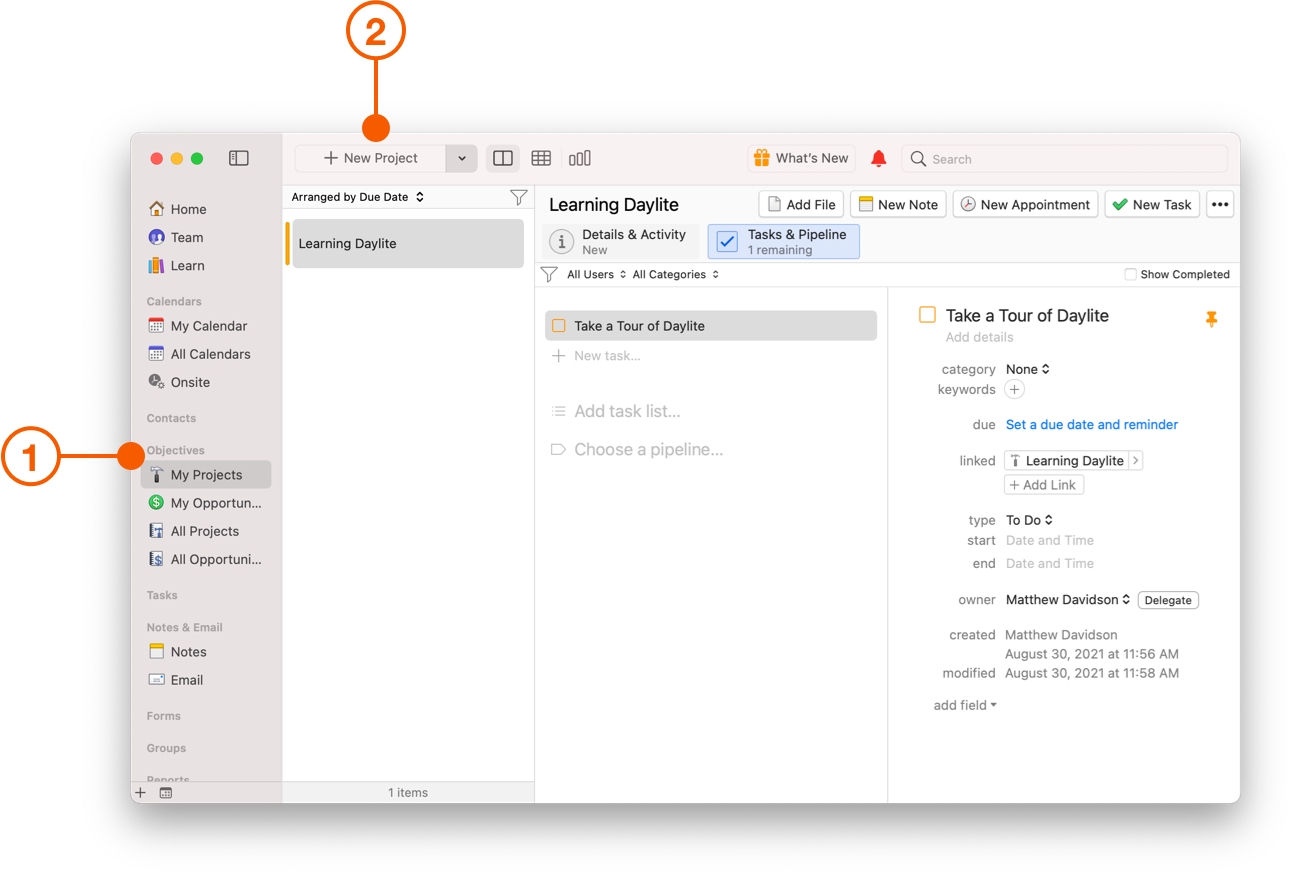
The first way to start a new Project is to click either All Projects or My Projects under Objectives in the Daylite Sidebar.
Select + New Project from the New Item button.
Starting a New Project from Contacts
You can create a project from a new or existing Contact. For example, if you were on the phone with a client and wanted to create a new project for them, this would link the new project to the contact.
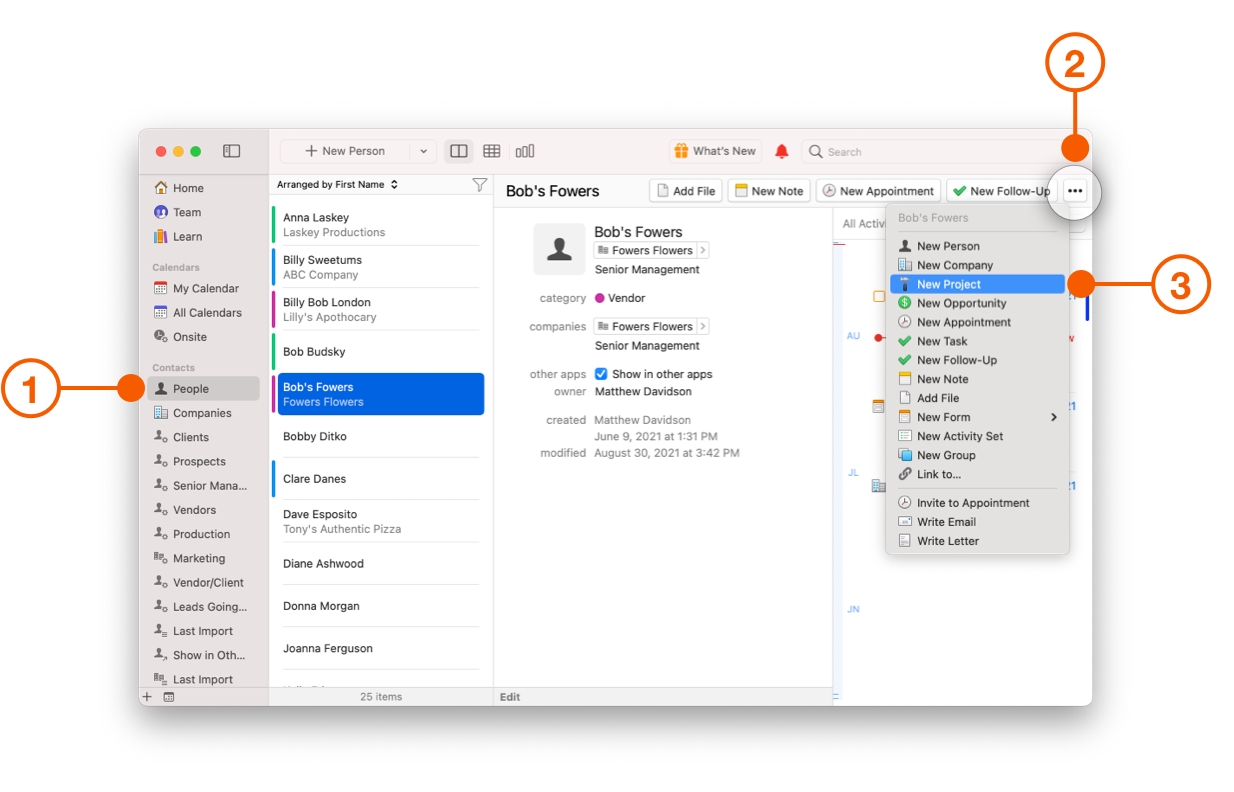
Click on People in the Contacts section of the Daylite Sidebar.
Select the … icon in the Activity View.
Select New Project from the menu.
Starting a New Project from Email
Email is one of the most common ways a Project starts. Daylite includes the Daylite Mail Assistant, a plugin for Mail on the Mac. It allows you to capture new Projects straight from your inbox, and link the relevant email so you can reference it later from the Project Activity.
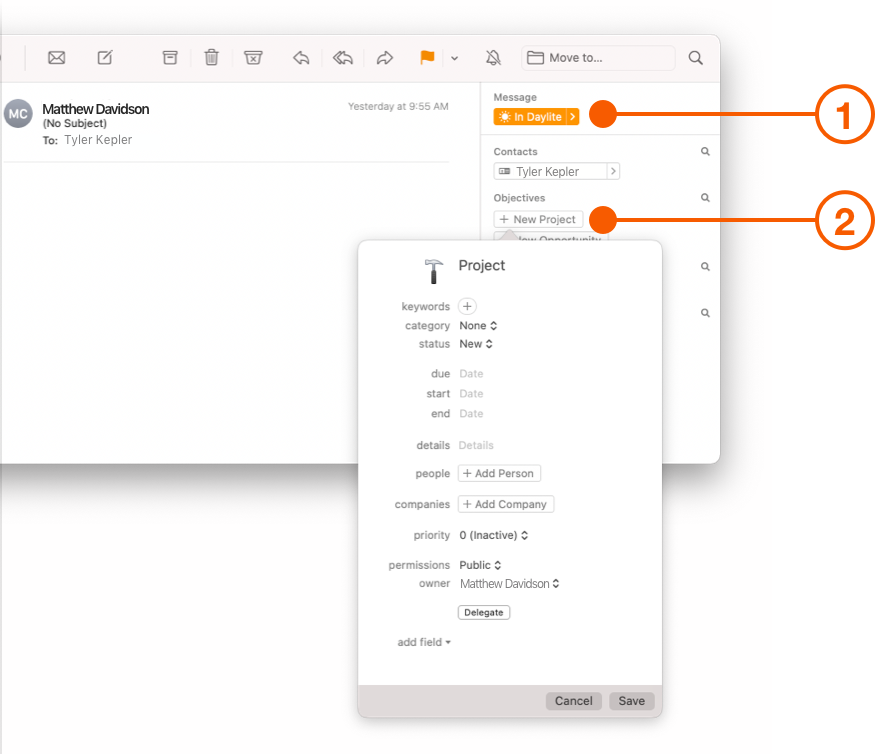
If you would like to add an email to Daylite, click the Add to Daylite button. The button will then change to In Daylite, which indicates that the current email has been added to Daylite.
Click New Project under the Objective section.
Starting a New Project from Tasks
Another way to start a new project is from an existing Task. You can convert an existing Task into a New Project in a few easy steps.
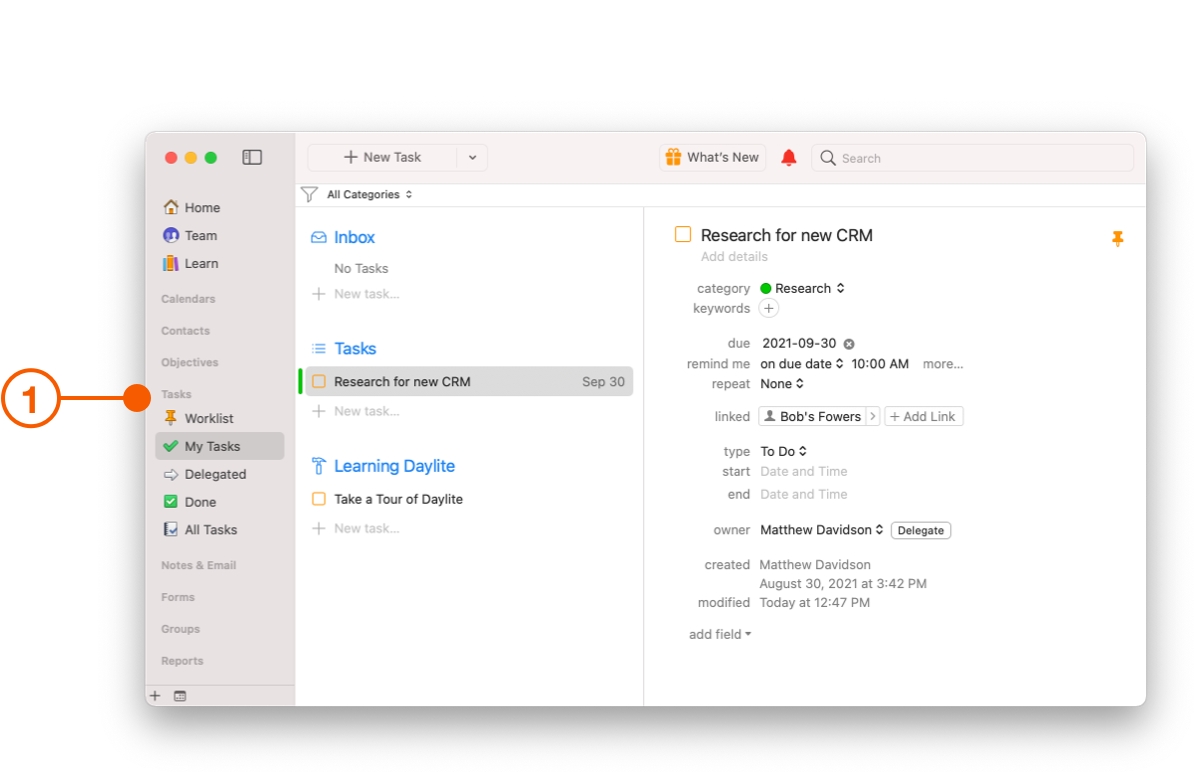
Click on My Tasks under the Tasks section in the Daylite Sidebar, then select the Task you want to convert to a New Project.
Next, choose Edit > Convert Task to Project.
As you can see from the screenshot below, the Task has been successfully converted into a Project, and placed in My Projects, under Objectives in the Daylite Sidebar.
Starting a New Project from an Opportunity
You can also create a new project from an Opportunity in much the same way you do for Tasks.
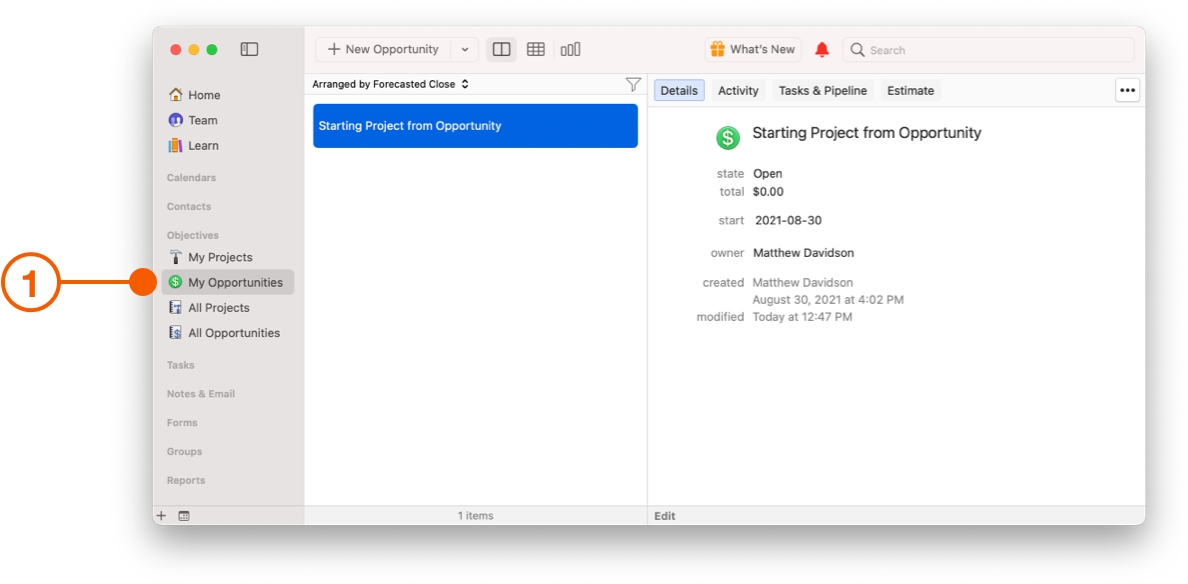
Click on My Opportunities under the Objectives section of the Daylite Sidebar, then select the Opportunity you want to convert to a New Project.
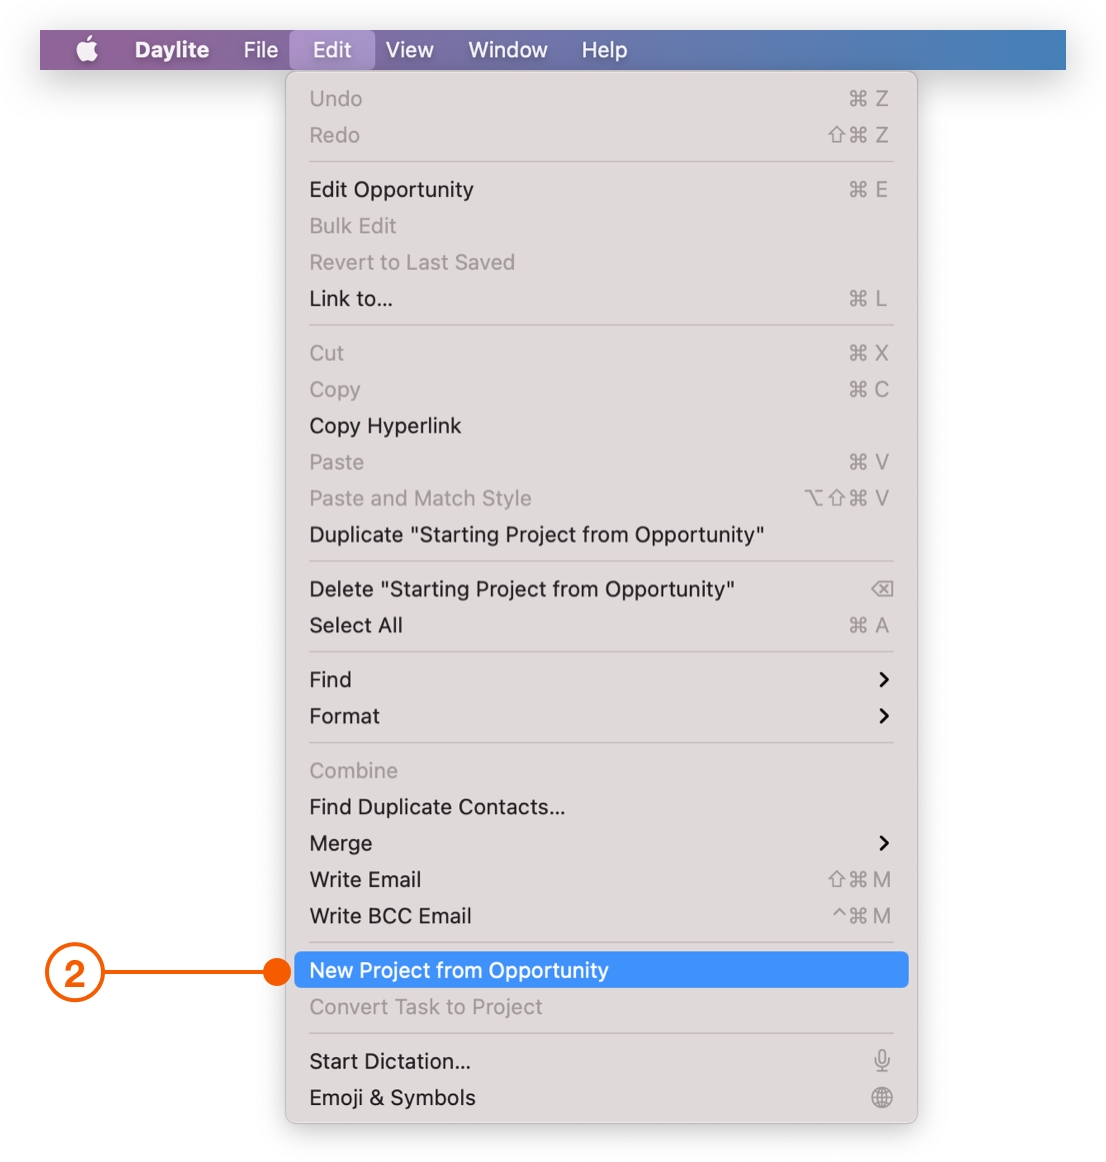
Choose Edit > New Project from Opportunity.
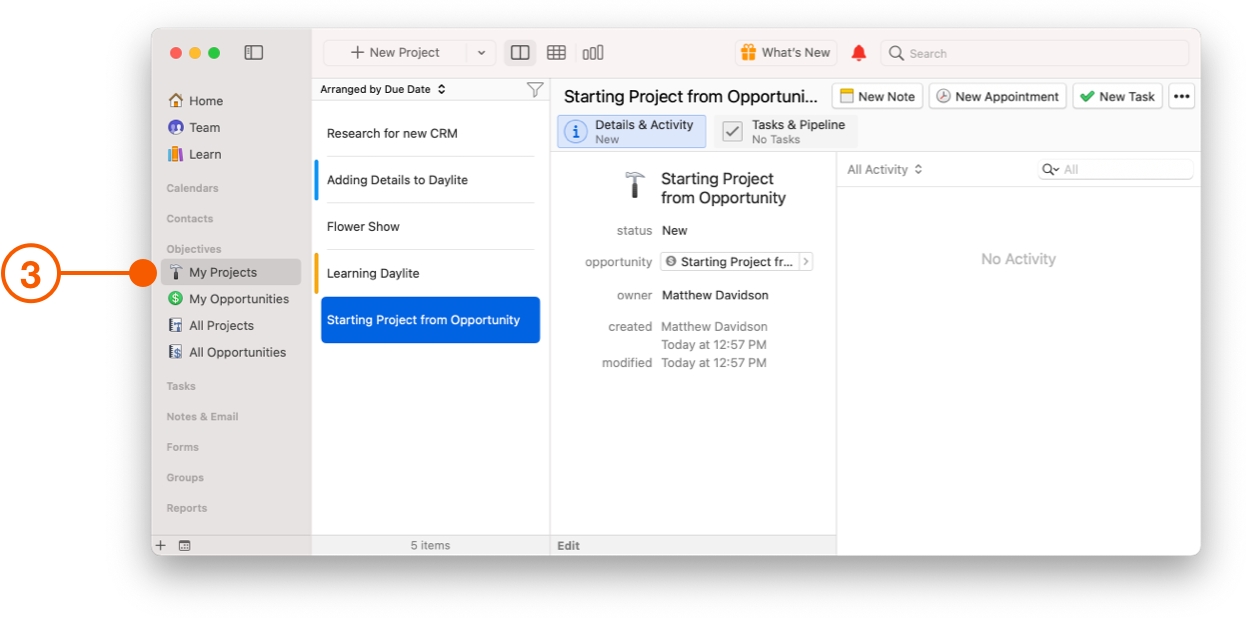
As you can see from the screenshot below, the Opportunity has been successfully converted into a Project, and placed in My Projects, under Objectives in the Daylite Sidebar.
Add the Details
Daylite gives you a lot of fields for your Projects. Just remember, you don't have to fill them all at once. Take your time, and fill in only the fields you have the information for. As your project takes shape, you can fill in more and more details.
Use the information you have now, and as you improve your processes, start using the different fields as needed.
The Basics
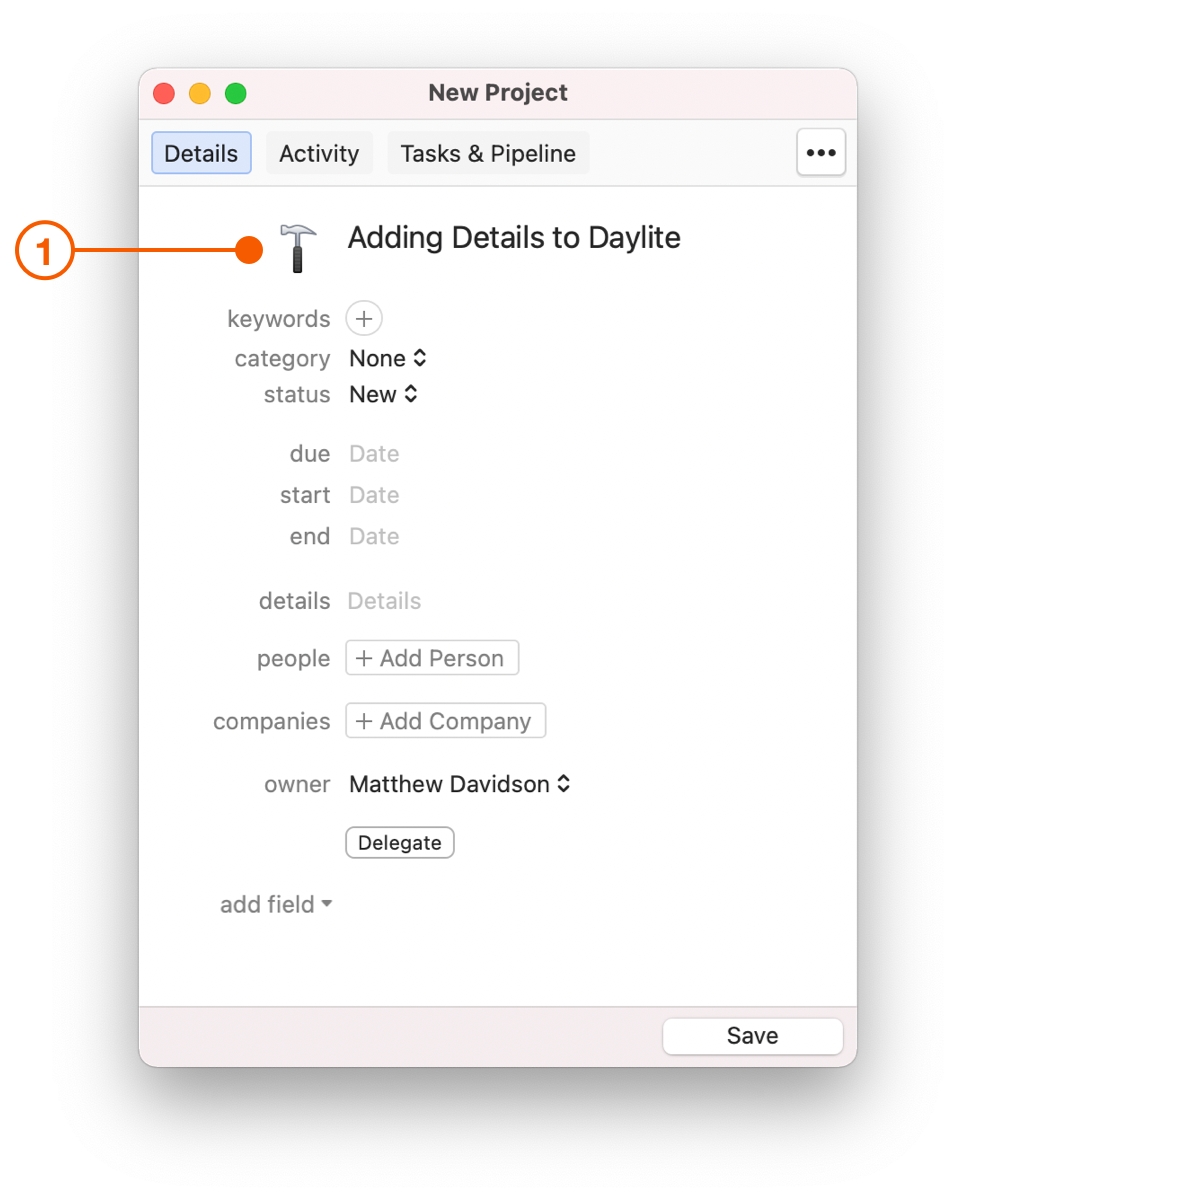
Every project should have a project name, start date, and due date, as well as a description of the project in the details field.
You can enter keywords or categories for your project.
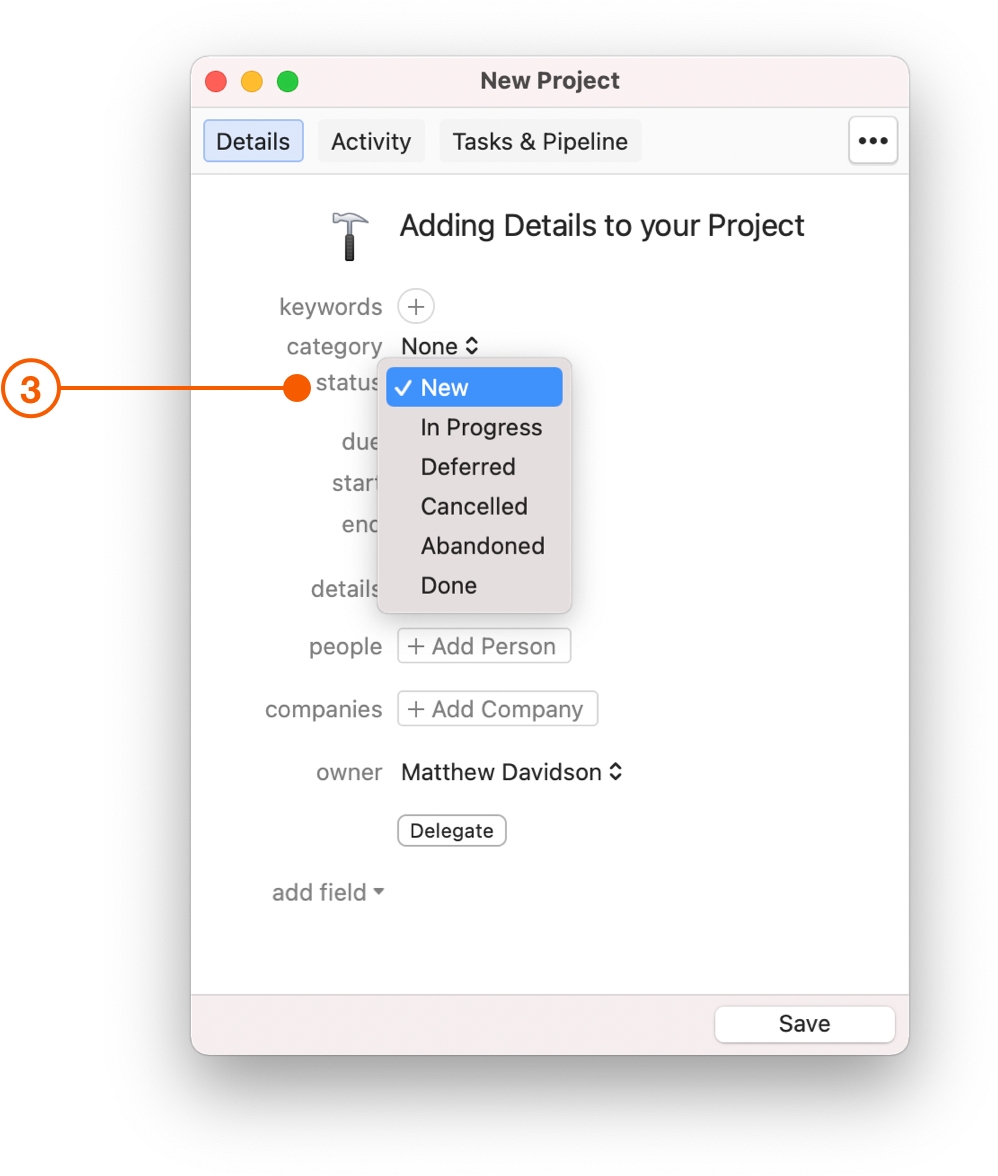
As your project moves along, you can change the status to reflect how far along it is.
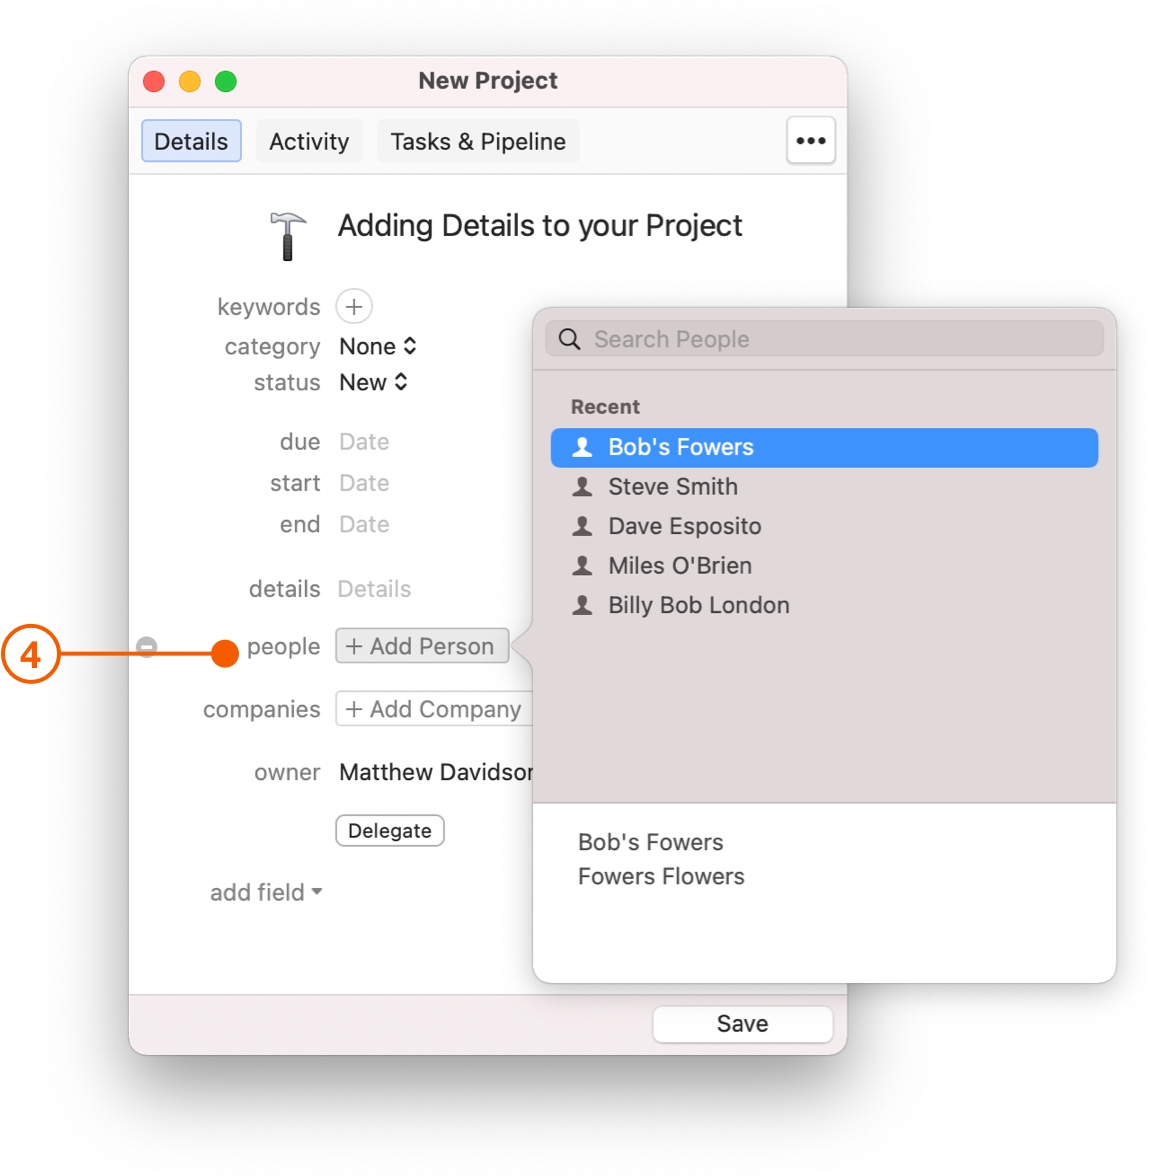
Link the project to people, by clicking Add Person.
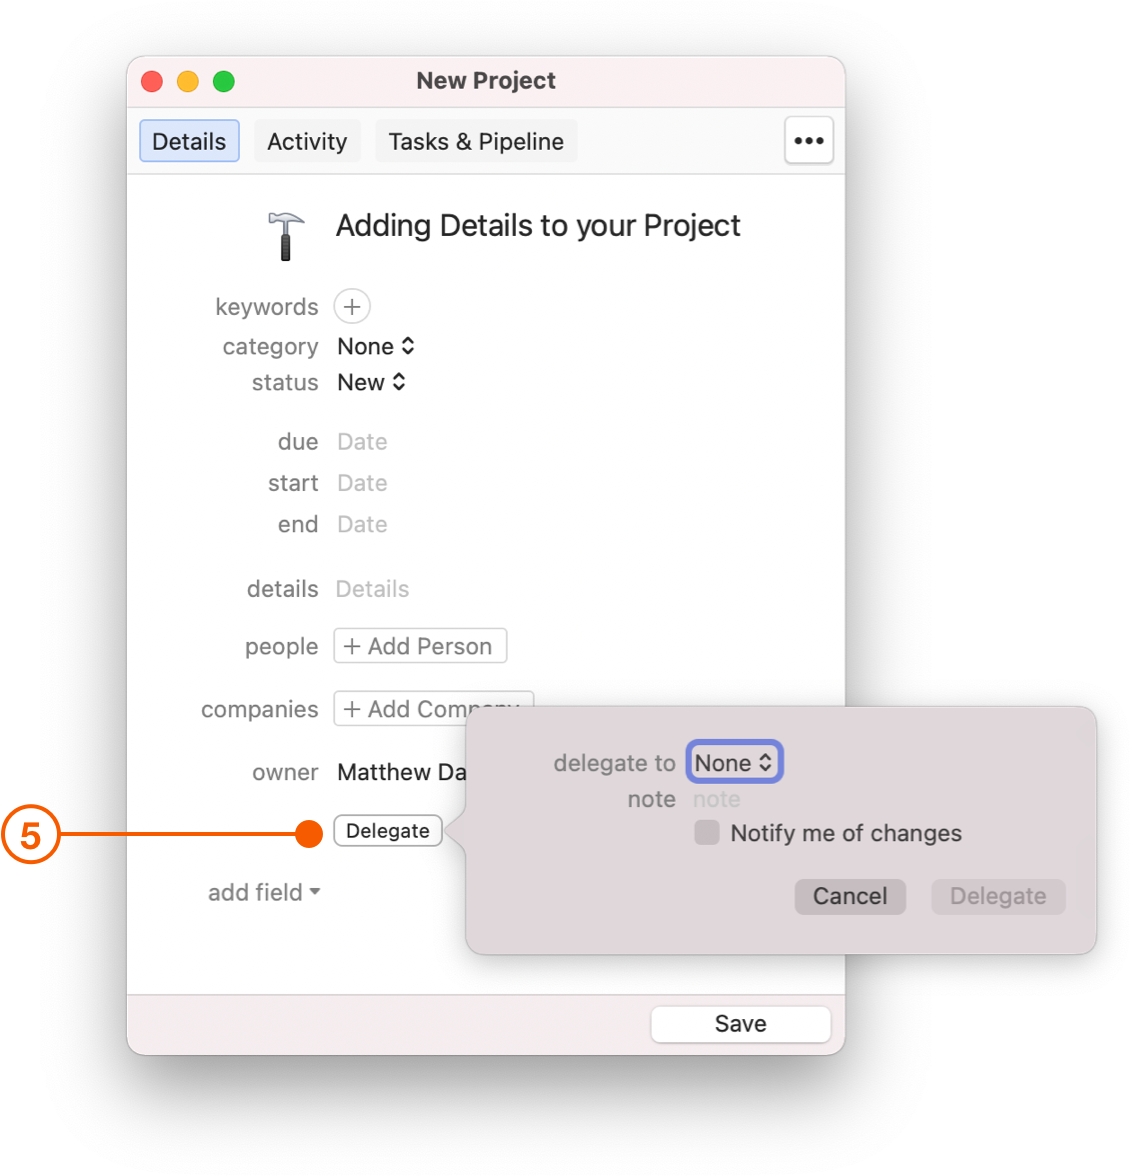
You can also delegate this project to others by clicking the Delegate button.
If you need to capture more information, click add field at the bottom of the project card and add the field you need.
Pro Tip:
Adding the same field over and over again?
Add it as a default!
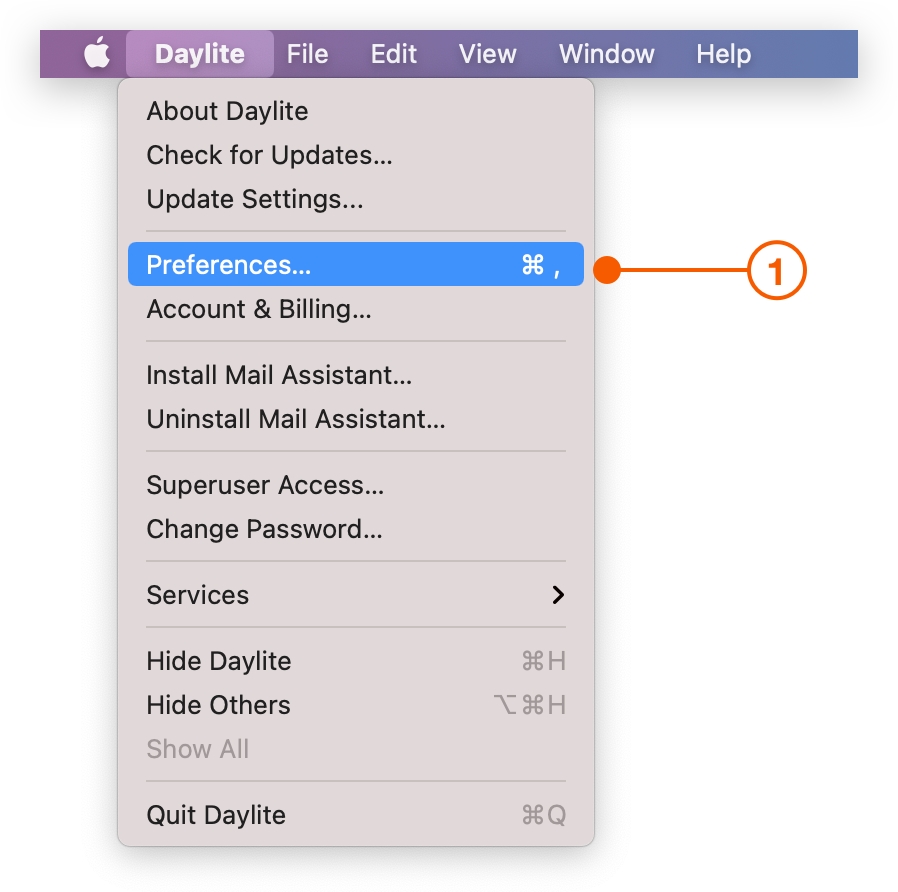
Choose Daylite > Preferences and select Default Values. Click Projects and add the fields you want to always see.
Classifying a Project
Once you have the basics down, it is time to classify the Project. Classifying your Projects is where Daylite sets itself apart. With Categories and Keywords, you can sort, filter, and segment your projects to learn what kinds of projects you are managing the most, and determine how to increase your productivity. With Roles you can quickly identify who on your team is responsible for what, and who you should speaking with at a company.
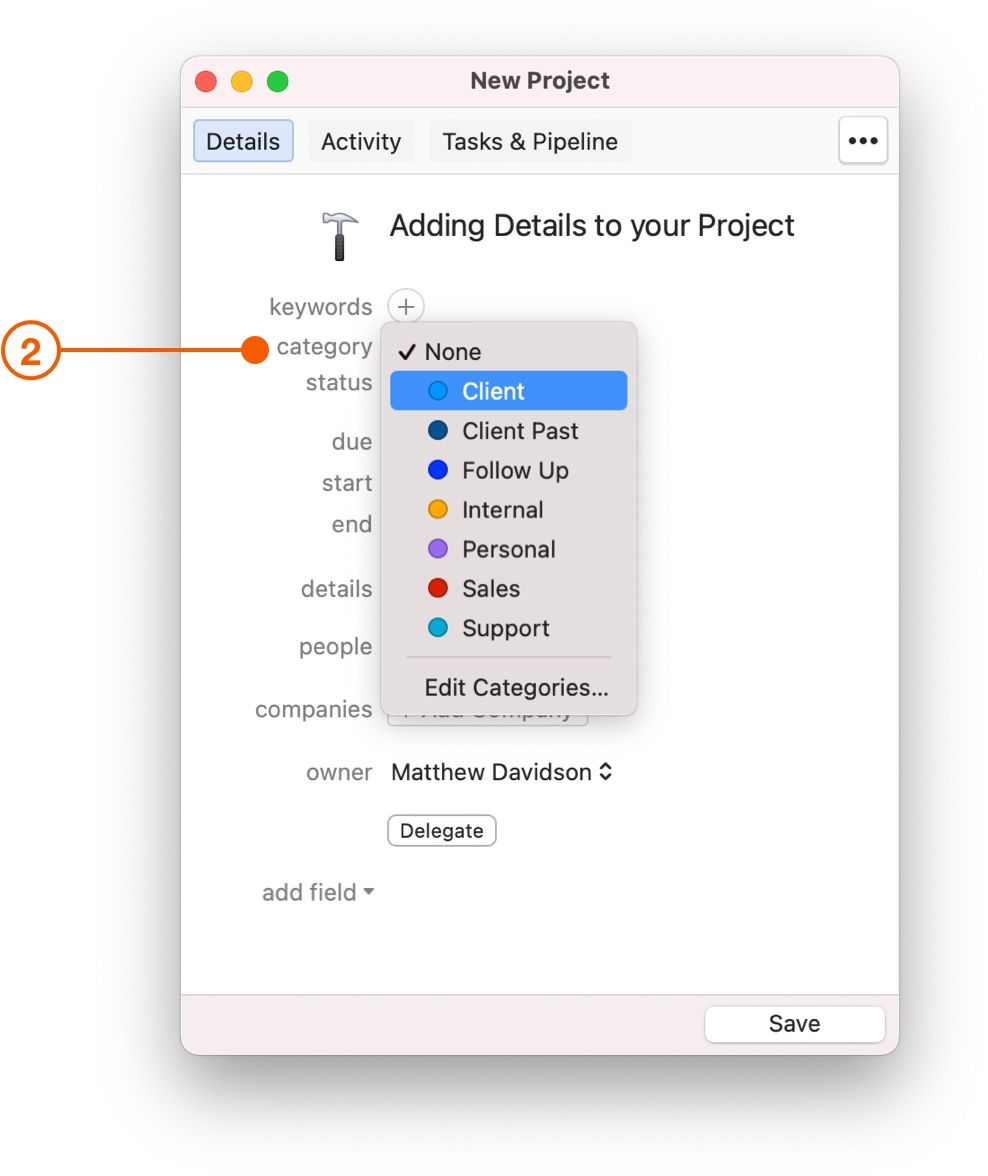
Category
A category is the top-level classification. A Project has only one category, so think about how you want to organize your Projects.
Here are a few examples of how you can categorize your Projects:
Product or service
Personal Coaching
Group Training
Speaking Event
Is this for you or a customer?
Internal
External
Who owns the Project?
Marketing
Human Resources
Executive team
To choose a Category, click on the Category pop-up menu. If no category fits, click Edit Categories... to open Daylite Category Preferences and create a new Category.
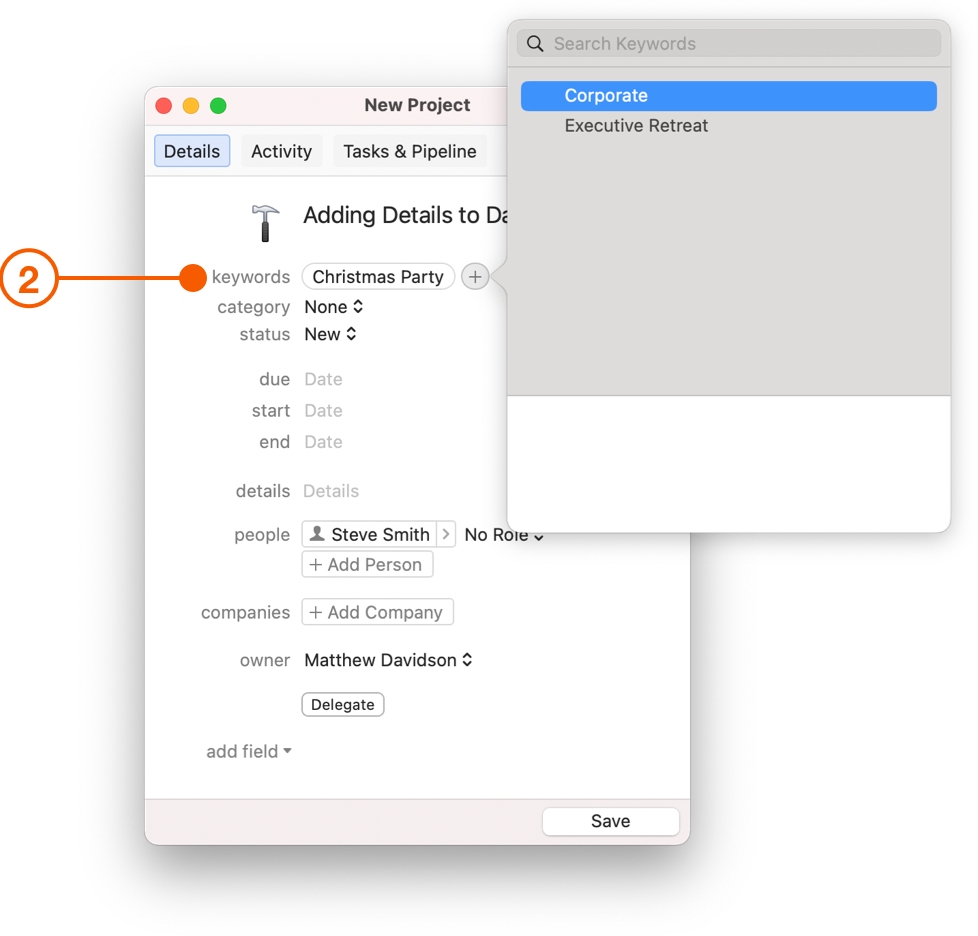
Keywords
Keywords are a more flexible way to classify your Projects. A Project can have as many keywords as you want, so you can use them for multiple reasons. To add Keywords click on the + button next to Keywords and type the Keyword you want to add.
Here are a few examples of how you can use Keywords to classify your Projects:
Objectives
Website Revamp
Customer Acquisition
Increasing Customer Satisfaction
Type of Client
Referral
Big Contract
Family/Friend
Additional service or product options
Additional Photographer
2-week coaching session
2 bedroom
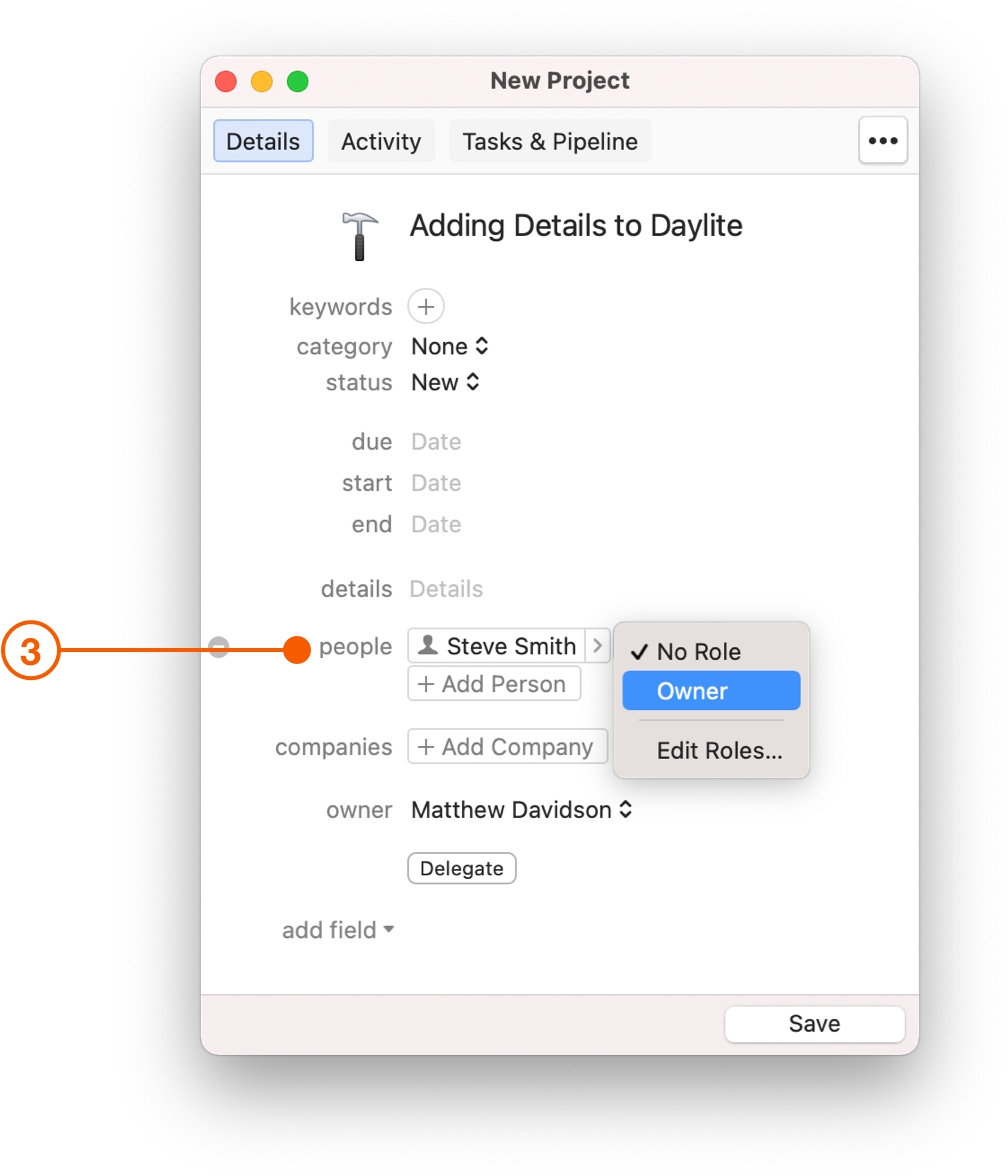
Roles
Link the people working on a project, like a project manager, designer, decision maker or other roles you may have. Then add your customers so you can make sure that if you need to contact them, you're reaching out to the right person.
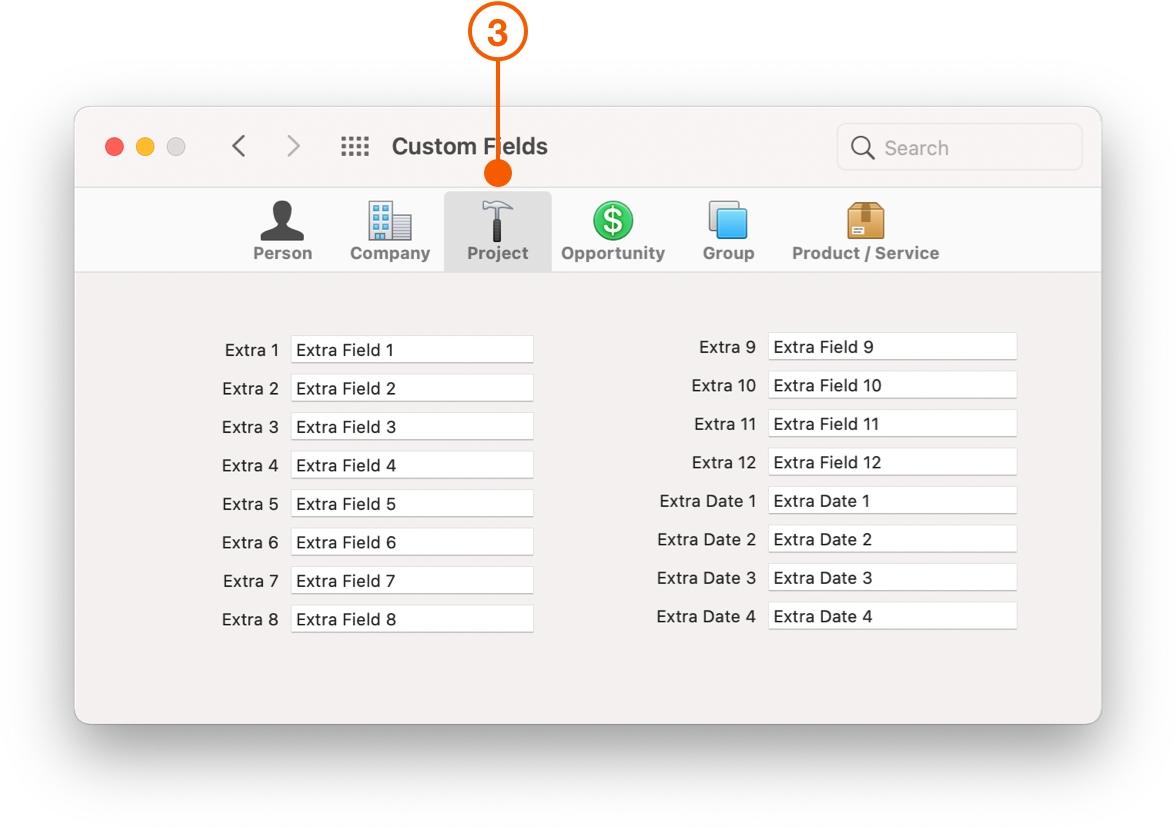
Custom Fields
Custom fields give you more flexibility. With 12 extra fields and 4 extra dates for Projects, you can choose what information you capture.
Choose Daylite > Preferences.
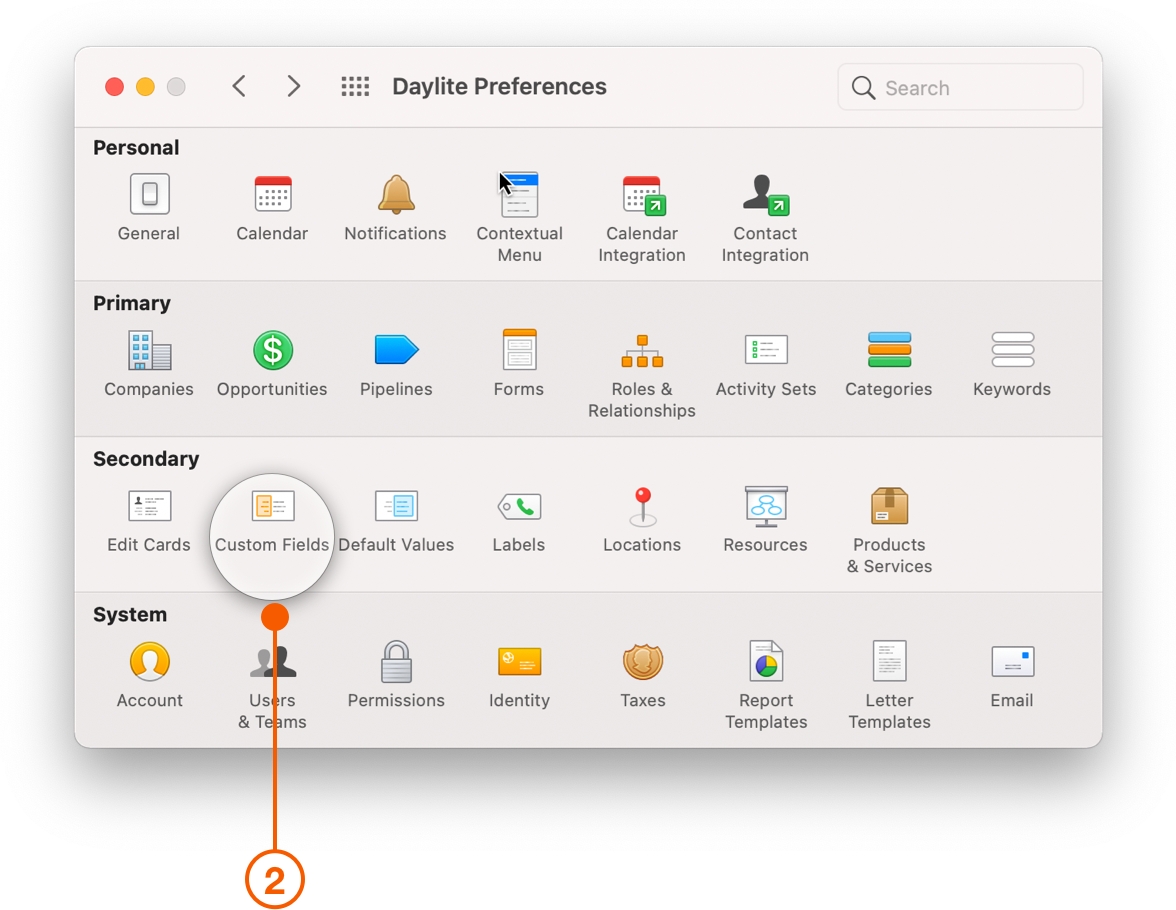
Choose Custom Fields.
Select Projects and type the title of the custom field you wish to use.
Wrap Up
With all the details about a project now in one place, your team has the tools to execute your plans and take your business further. Now you're ready to Organize All The Moving Pieces In A Project, Stop Things Falling Through The Cracks, and Streamline Your Projects.
Last updated