Remember the Details About the People You Meet
The world is a busy place.
We're always on the go, pressed for time, and even though we know our memories are far from perfect, we don't always stop and write things down. Remembering your client's birthday, or their favourite team sport for example, can be the difference between getting the sale and losing a valuable customer.
That’s why, no matter where you go, you can capture new Contacts quickly in Daylite.
Capturing New Contacts in Daylite
Daylite gives you a lot of options to create a new Contact. You can create a new Contact within Daylite, on your iPhone and iPad, and from your Mail on the Mac.
Capturing a Contact In Daylite
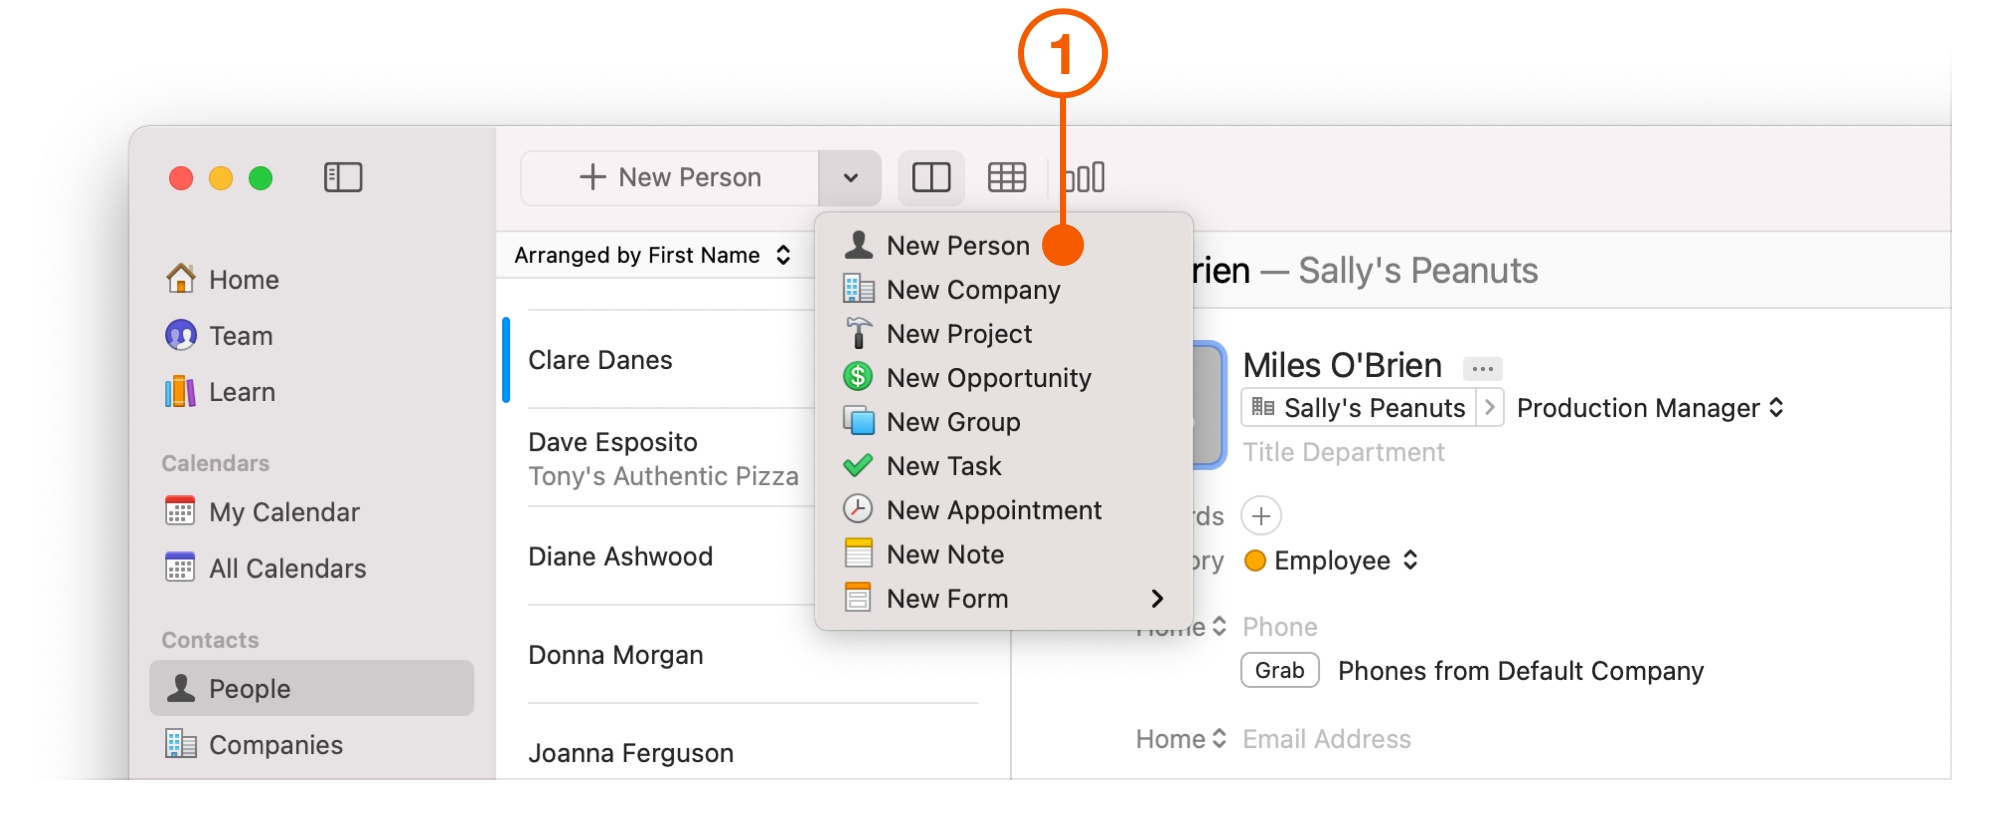
The easiest way to capture a new Contact is to use the New Item button.
Select the New Person button, or click the drop down arrow to the right.
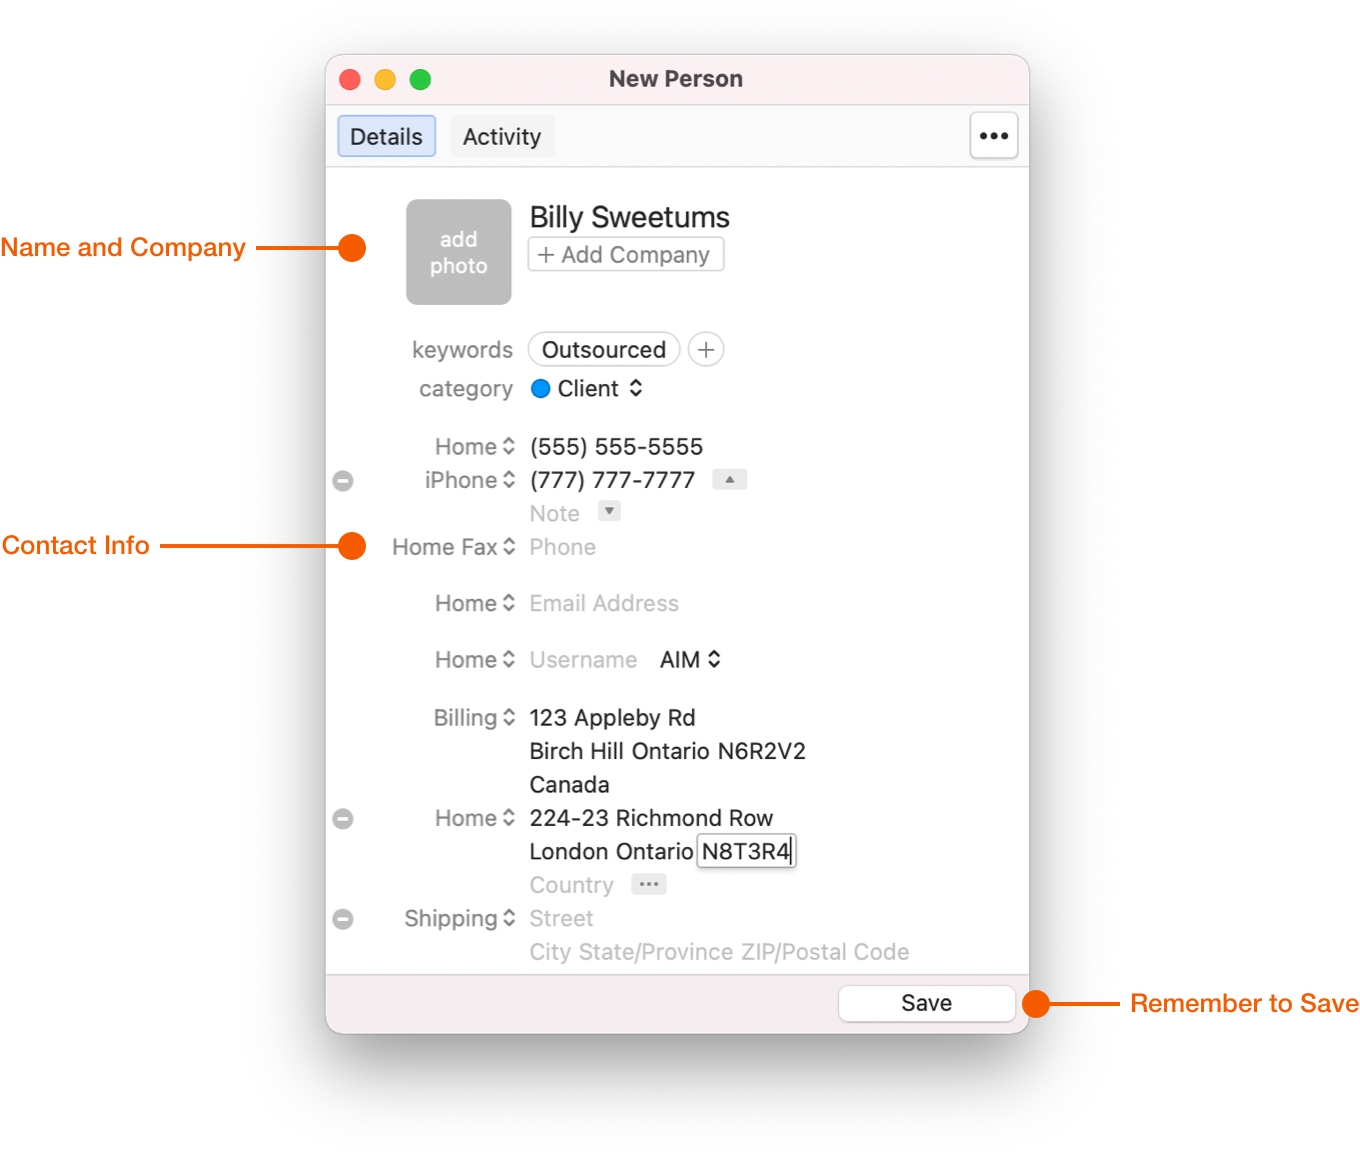
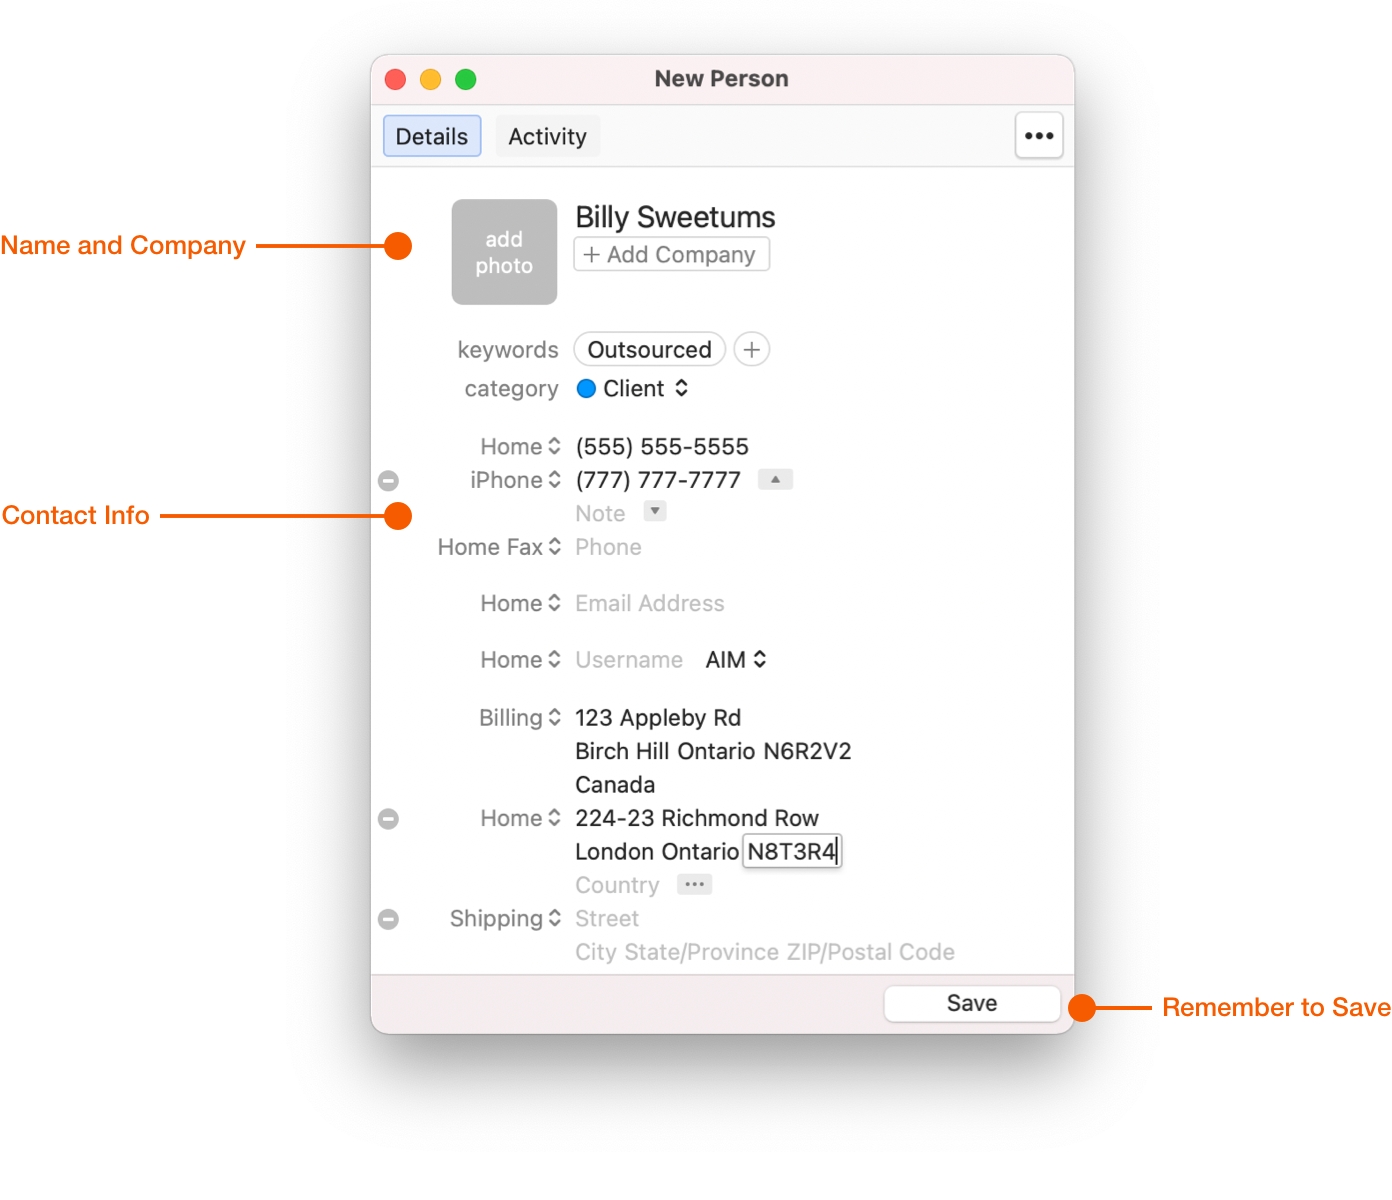
You can now fill in the appropriate Contact fields. Click Save when finished.
Capturing a Contact from Email
Daylite includes the Daylite Mail Assistant, an extension for Apple Mail. This extension allows you to capture things like new Contacts straight from your inbox, while also linking them to the email.
To begin, select the email and click Add to Daylite.
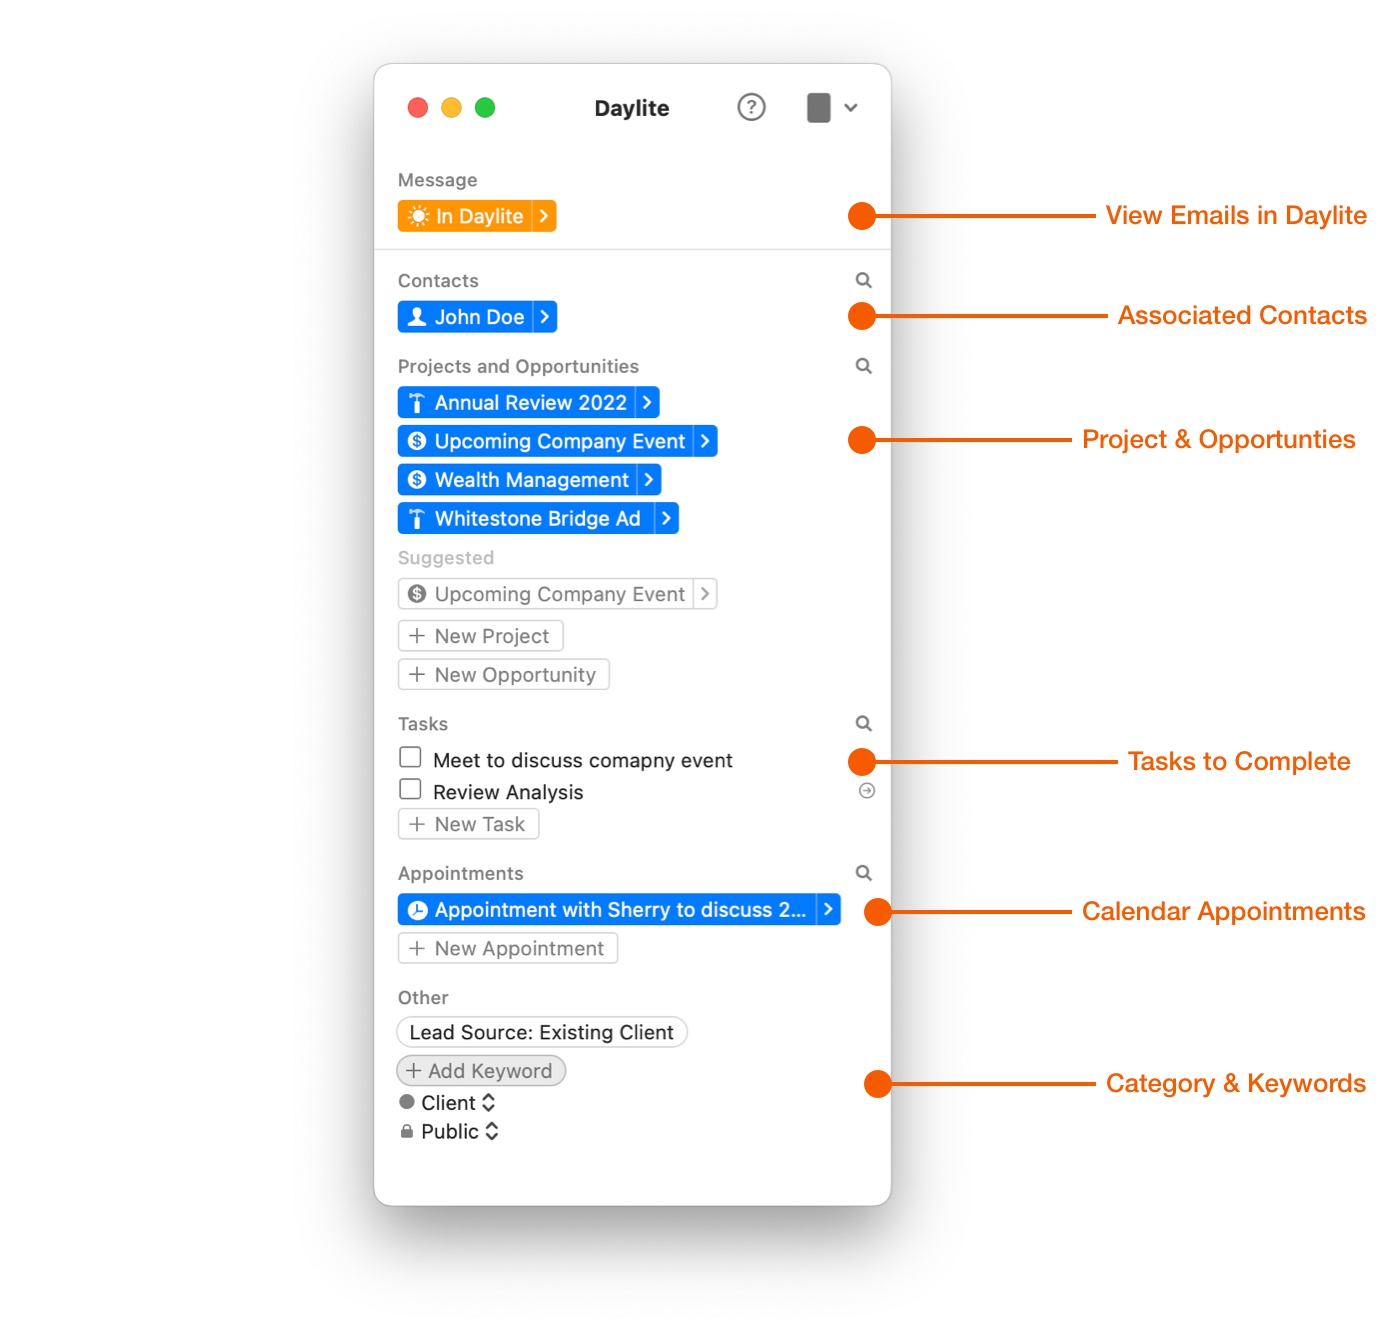
The Daylite Mail Assistant window now shows In Daylite > highlighted in orange to let you know the email has been added to Daylite, and the extracted Contacts from the email highlighted in blue. If an email is not extracted, Daylite may place it under Suggested. You can also click the magnifying glass next to Contacts and type in the name of the person you want to add to the record.
You can also link additional information such as Projects and Opportunities, Tasks, Appointments and Other inportant information data.
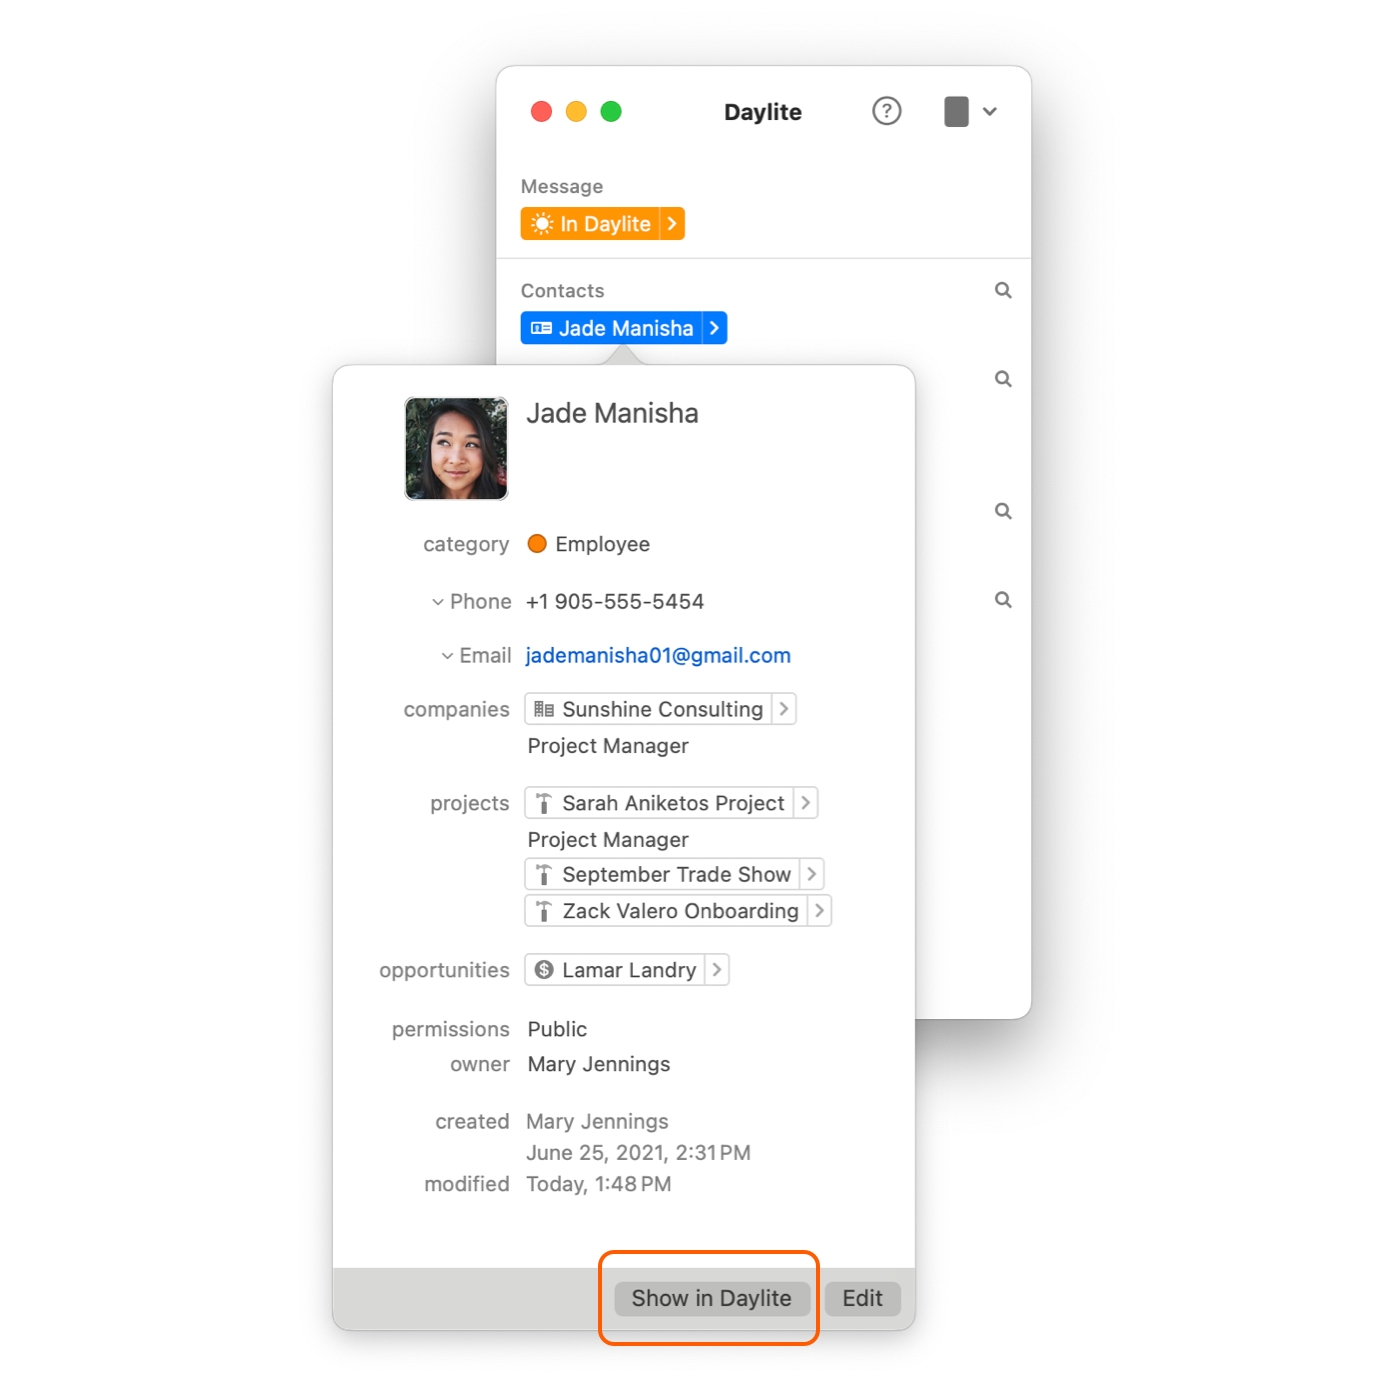
Click the arrow next to the Contact's name. This will open a popover that allows you to edit the Contact info as well as view the Contact in Daylite.
Capture a Contact on your iPhone & iPad
You're not always in front of your Mac, and that's where Daylite for the iPhone and iPad comes in.
Contacts you capture while on the go will sync with your other Daylite devices, so you always have the most up to date information.
From Your iPhone
Tap the Contacts tab.
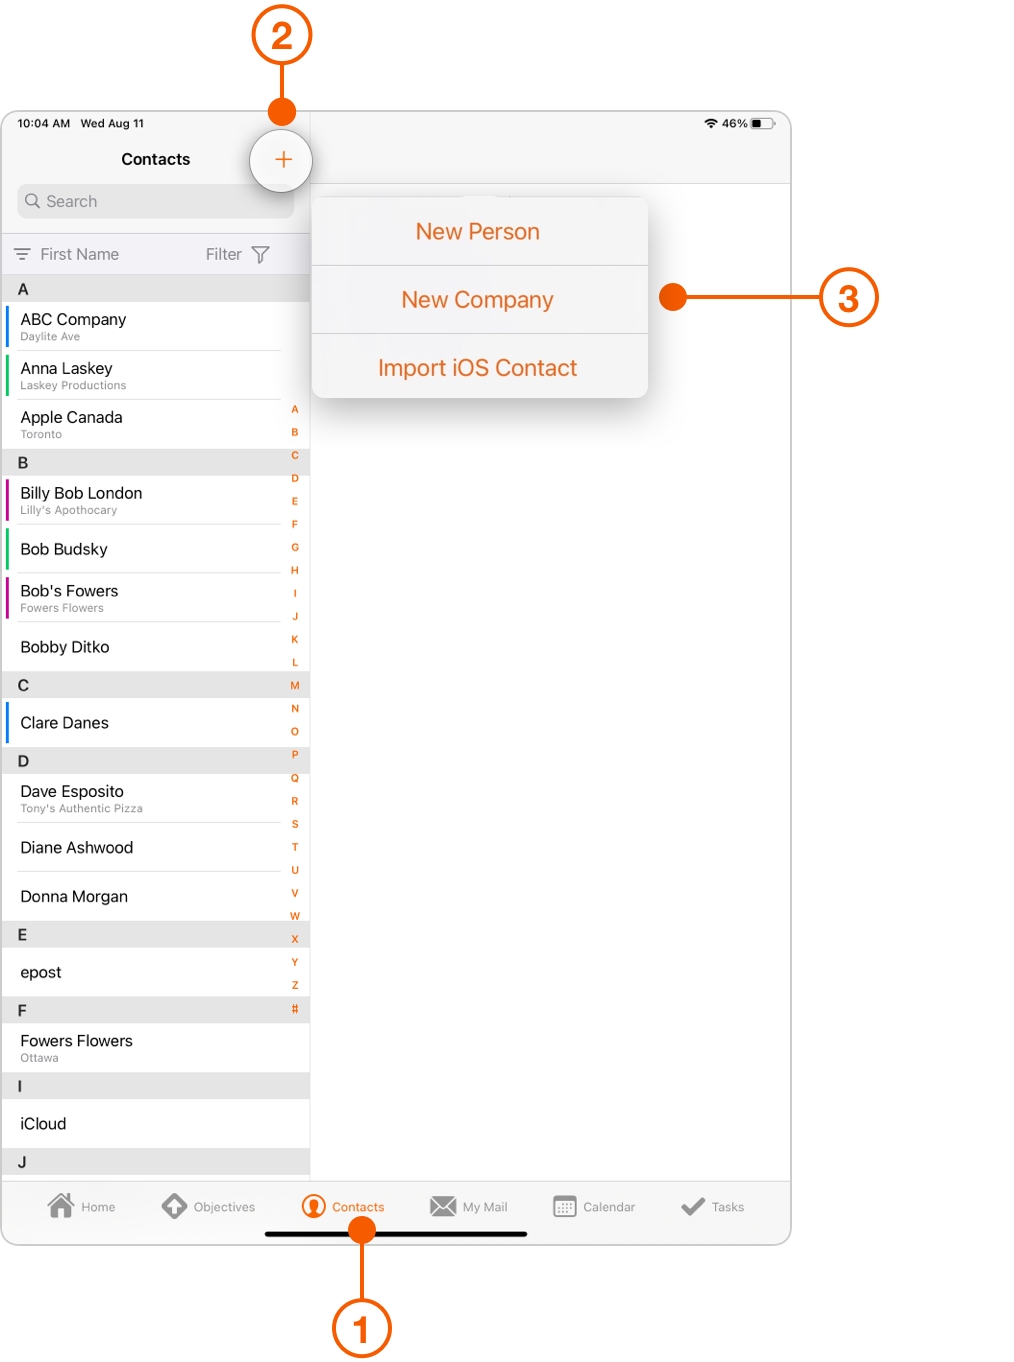
Tap the plus (+) button on the top right side of the screen to add a new contact.
Choose to create a New Person, New Company, or Import iOS Contact.
From Your iPad
Tap the Contacts tab.
Tap the plus (+) button on the top right side of the screen to add a new contact.
Choose to create a New Person, New Company, or Import iOS Contact.
Contact Basics
Daylite gives you a lot of contact fields, but don't panic.
You don't have to use them all.
Gather the information you need today, and as your relationships grow you can edit existing fields, or add entirely new ones. You can add and change labels for fields when creating contact cards by clicking on the label. Additional Fields generate automatically, and you can assign each field as either Primary or Secondary.
For strategies about capturing new relationships, watch the Build and Nurture Relationships Webinar.
Classifying
When you classify your Contacts, you can do powerful things such as sort, filter, and segment your Contacts with Categories and Keywords.
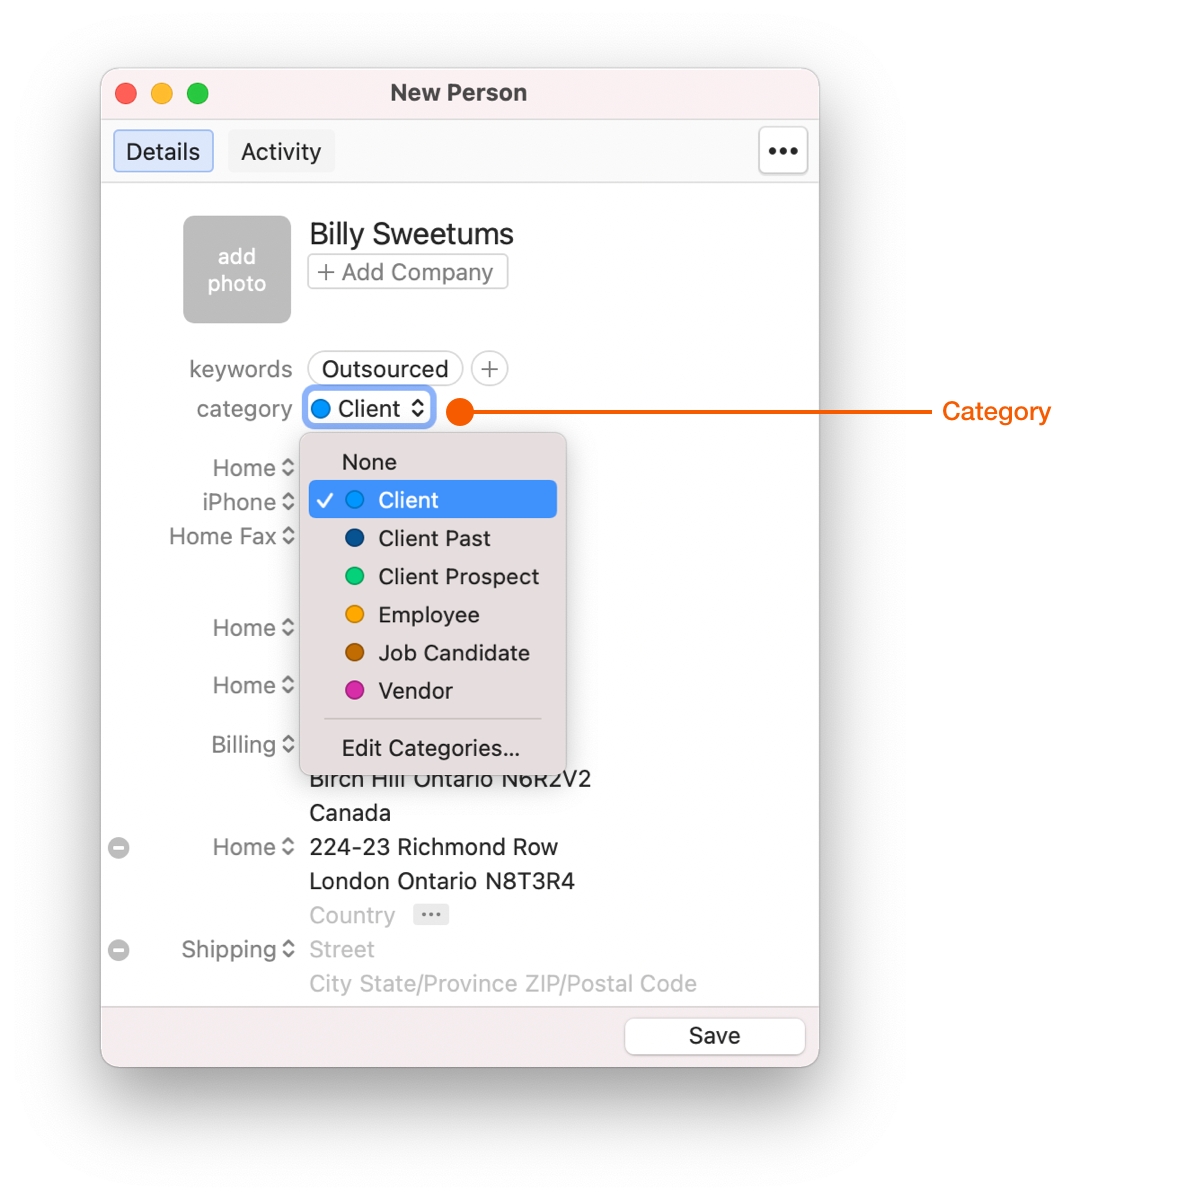
Category
Categories are the top-level contact classification. A Contact can only have one Category, so when classifying a Contact, consider who they are in relation to you and the business. Add a Category to a Contact by clicking the Category pop-up menu. If no Category fits, click Edit Categories... and create a new Category.
Here are a few examples of how you can categorize your Contacts.
Where they are in your sales funnel
Prospect
Lead
Customer
Business relationship
Supplier
Vendor
Coach
Employee
Personal contacts
Family
Friends
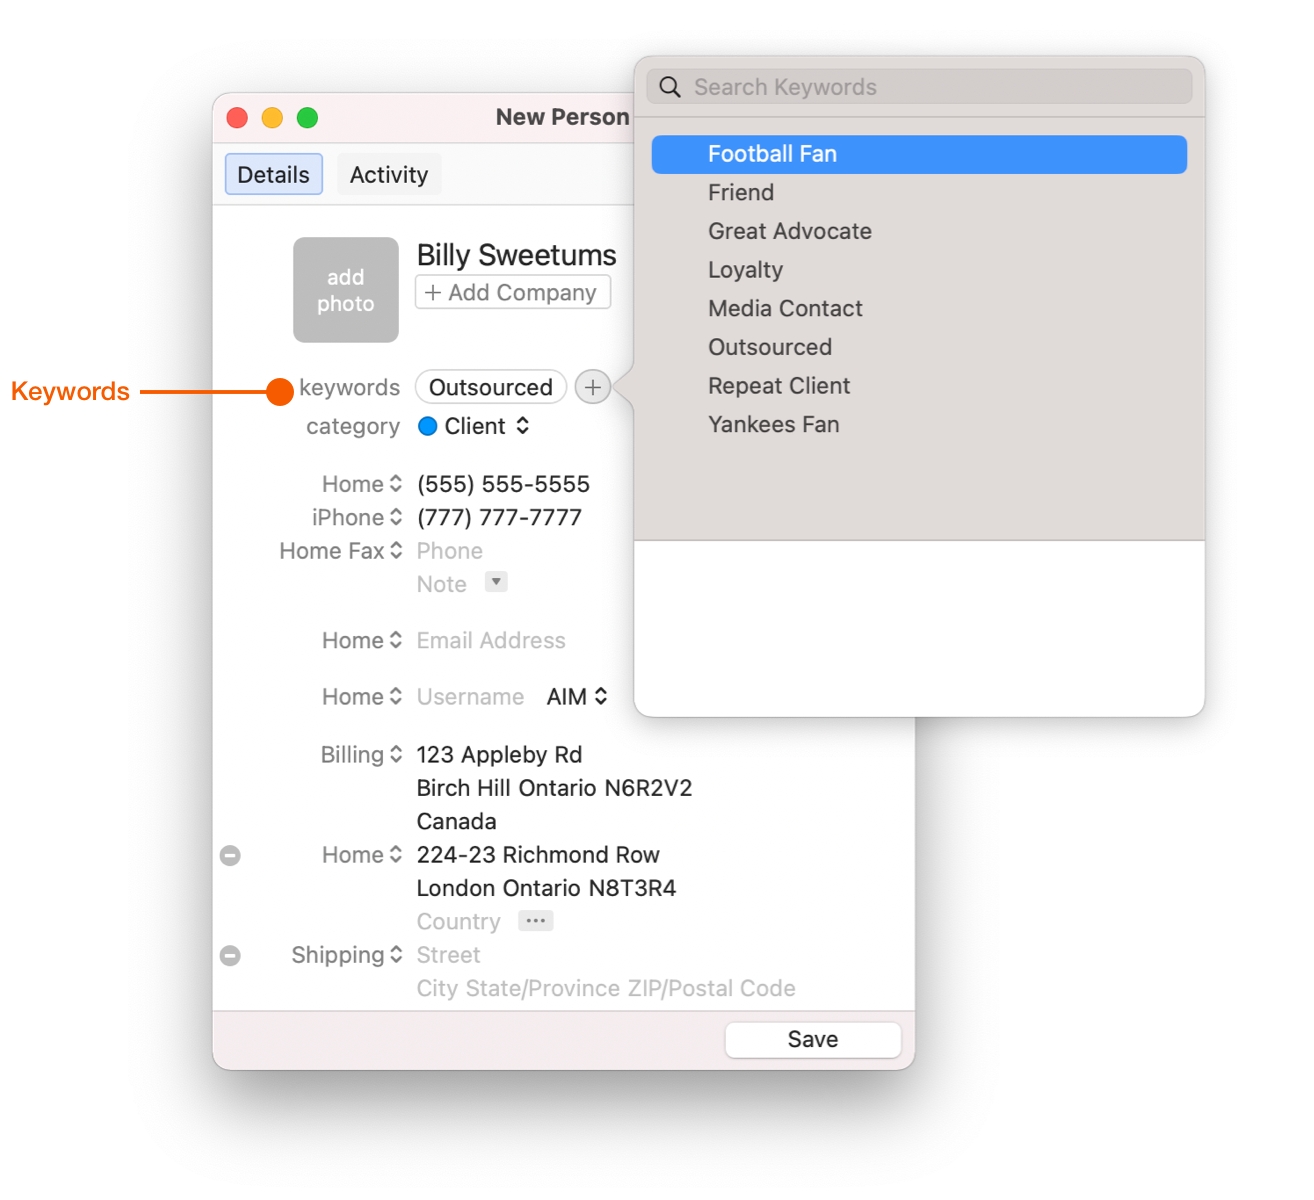
Keywords
Keywords are more flexible than Categories. A Contact can have as many keywords as you want, so feel free to use them for as many reasons as you need. Add a Contact Keyword by clicking the plus button (+) next to the Keywords field and type the Keyword you want to add.
Here are a few examples of how you can use Keywords to classify your contacts:
Type of lead
Cold
Hot
Source
Facebook
Trade Show 2018
Referral
Buyer preference
2 Bedroom House
Monthly Coaching Sessions
Wedding Package 2
Linking People and Companies
You'll rarely meet someone who isn't involved with another company or knows someone else in your network. When you link People and Companies together, you can choose Roles within a Company, and Relationships between people.
Now you can always make sure you're speaking to the right person at a Company, track referrals, and see how your network grows.
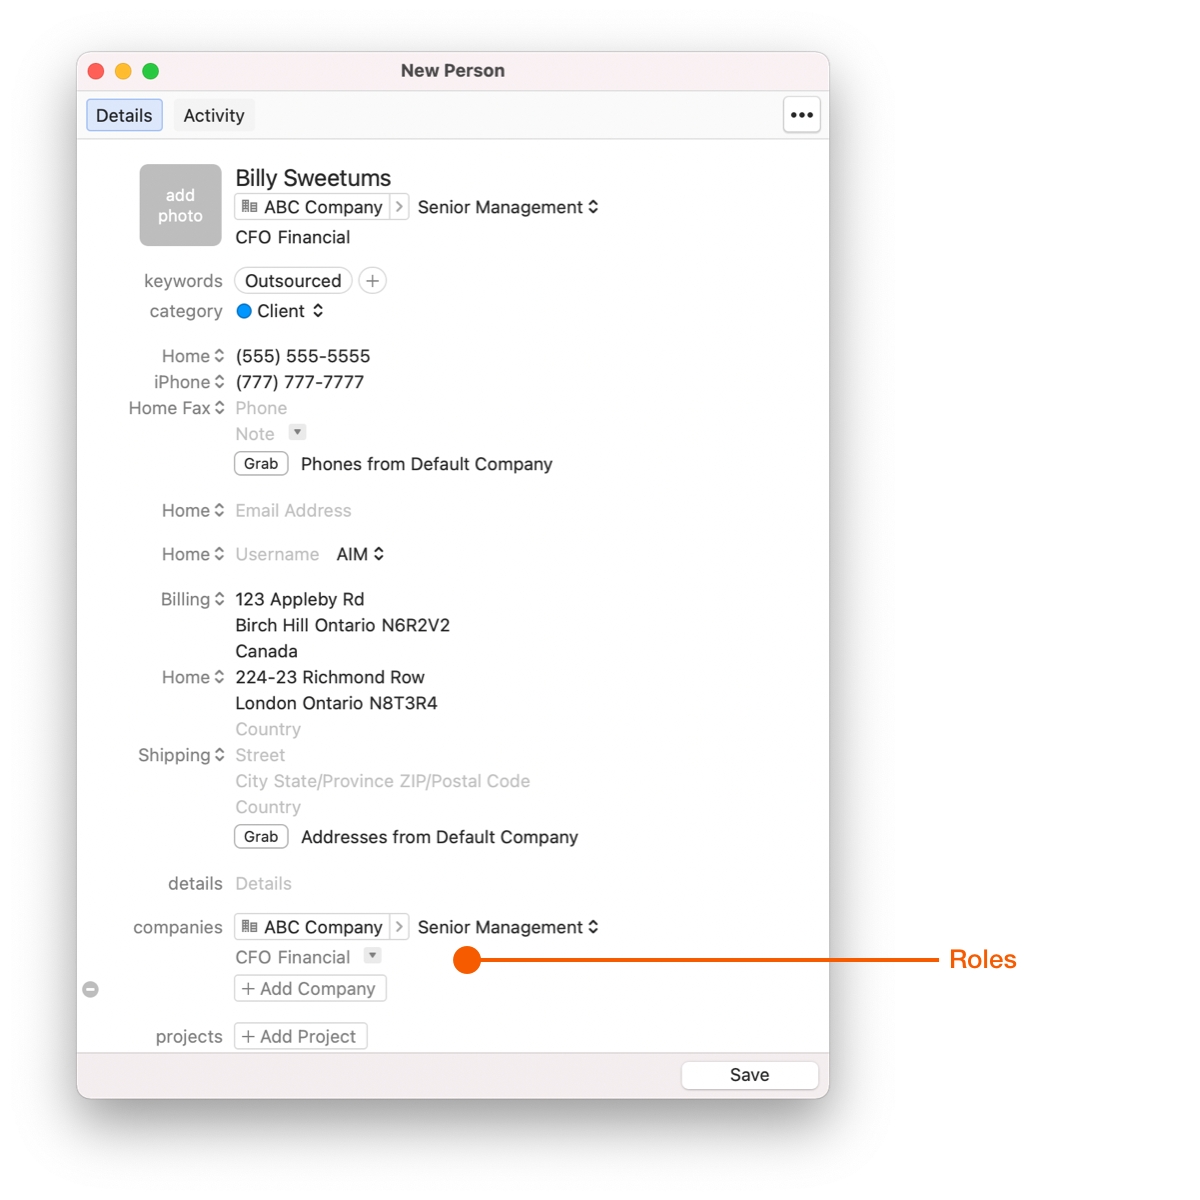
Roles
When you link a Person to a Company, you can choose what their role is. This helps by documenting who does what in a company. That way, when you call or email a company, you're sure you're reaching the right people. You can also do things like build an entire campaign targeting specific roles, such as coaching for C-level executives.
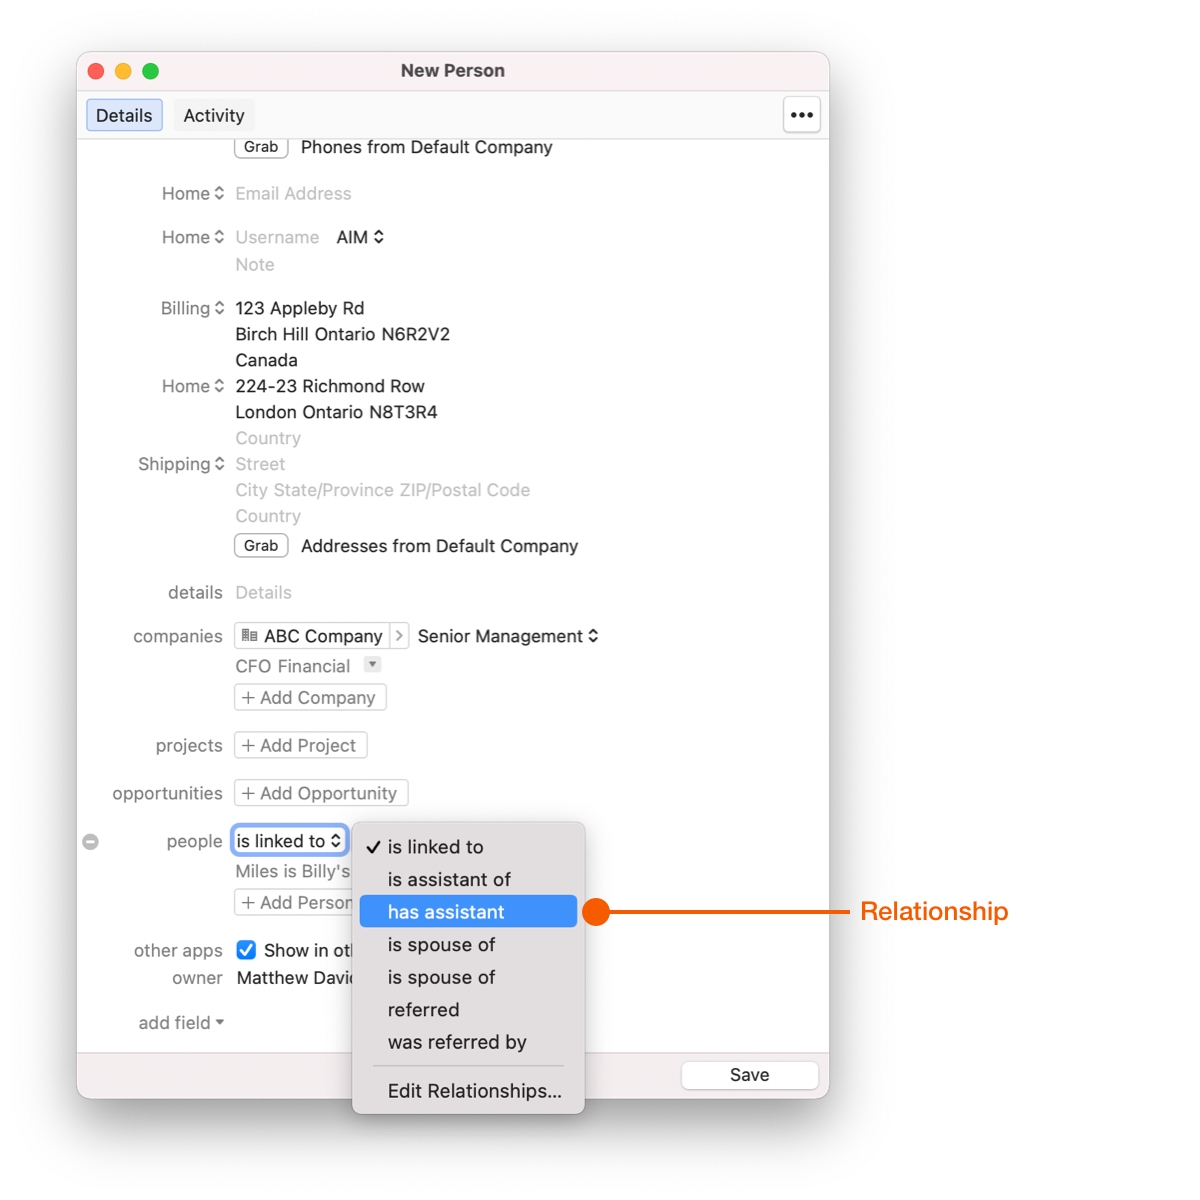
Relationships
When you link a Person to another Person, you can choose their relationship. This is helpful when working with multiple people in a family, tracking referrals or business partners.
Wrap Up
Keep the details straight and capture new Contacts in Daylite.
More than just a contact manager, Daylite gives you powerful classification tools to track categories, assign keywords, as well as define roles and relationships. Remember it all, and action it in ways you never could before.
Last updated