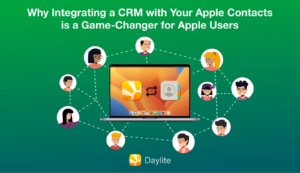
It’s no secret that here at Marketcircle, we love Apple devices. We built Daylite exclusively for the Mac, iPhone, and iPad and designed it to play nice within the Apple ecosystem. This allows you to easily import your Apple Contacts and Calendars into Daylite, making Daylite the “hub” of your workflow and take advantage of sharing integration with Apple Contacts & Calendars.
Why should I make Daylite my “hub”?
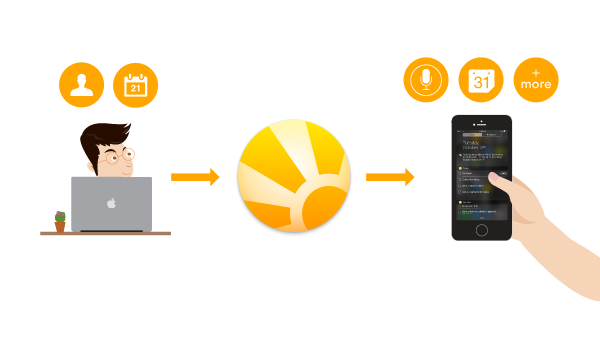
By making Daylite the “hub” of your workflow, you can see all your personal and business information in one place. Instead of having to flip between your personal appointments in your Apple Calendar, and your business appointments in Daylite, you can see everything together and get a better overview of your schedule. You can also take advantage of sharing integrations with Apple Contacts & Calendar. When you import your Apple Contact and Calendars in Daylite, information is only going one way. Sharing integration allows Daylite to pass information back and forth between Apple Contacts and Calendars, as well as third party applications (for example, Fantastical). This is done through CardDAV and CalDAV support.
What is CardDAV & CalDAV and why should I use it?
In simple terms, CardDAV & CalDAV are the industry standard languages that Apple Contacts and Calendars use to communicate with other apps. Imagine that Daylite speaks English, Apple Calendar speaks Spanish, and a third part app like Fantastical speaks French. CalDAV would be the translator helping all these apps communicate with each other and share information. By setting up CardDAV and CalDAV you can take advantage of these benefits with the extended functionality.
Get these benefits of calendar sharing:
1. Get additional reminders in Notification Centre
With calendar sharing you can get additional reminders for your appointments in Notification Centre on your iPhone, iPad, as well as on your Mac. You don’t even have to open Daylite to check your appointments for today. Just swipe down to see your Daylite appointments right in the Notification Centre on your iPhone or iPad.
2. Use Siri to schedule appointments in Daylite
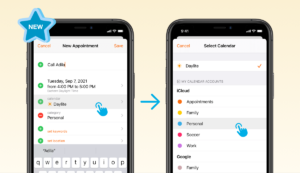
Want to be able to schedule a meeting in Daylite, hands-free? Within the Apple Calendars preferences, set the default to Daylite. This will put an appointment in Daylite by default any time you add a new entry in your Apple Calendar. You can then use Siri to create an appointment for you and it will automatically also be added to your Daylite calendar.
3. View external shared calendars in Daylite
Let’s say you have a shared Apple Calendar with your family or a shared Google Calendar with some friends. You can view this calendar on top of your schedule in Daylite. Because of CalDAV support, you can subscribe to this external calendar and choose to view it in Daylite. Read this article for instructions on how to setup calendar sharing on your Mac.
4. Check travel time for appointments
When you create an appointment in Daylite and set the location, you can leverage the functionality within Notification Centre to know the travel time required to get to the next appointment. When you check your appointment on your iPhone or iPad in Notification Centre, it will show you the appointment in Daylite (and also in your Apple Calendar) and will display how many minutes it will take you to drive there now.
5. Allow external people to book appointments in your calendar
You can allow other people outside of Daylite to book appointments right in your calendar, then view these appointments in your Daylite calendar using an online scheduling tool that supports CalDAV such as TimeTrade. Within your TimeTrade preferences, choose Daylite as your calendar that appointments will be added to. You can also choose in these preferences to use appointments in Daylite when displaying your busy times. This way, appointments scheduled in your Daylite calendar, will show as busy in your TimeTrade calendar. You can then send a link to people outside of Daylite where they can view your schedule in TimeTrade and book appointments with you. These appointments will then show on your Daylite calendar so you can see everything in one place. Your Apple Calendar app will need to be open for this to work, as Daylite and TimeTrade will be communicating through this.
Get these benefits of contact sharing:
6. Take advantage of Caller ID
By sharing contact information between Daylite and Apple Contacts with CalDAV, you can take advantage of Caller ID and see who’s calling you on your iPhone even if you’ve only added the contact to Daylite, but not your Apple Contact list. When you set up CardDAV it creates a Daylite group within your Apple Contact list on your iPhone or iPad so your Daylite contacts essentially become part of your Apple Contact list without having to enter them in twice.
7. Add people right to Daylite using business card scanners
When you use a business card scanner that supports Contacts on the Mac, it will automatically create a new person in your Apple Contact list when you scan in the business card. You can take advantage of this functionality and also create a new contact in Daylite by setting up CardDAV. As mentioned in the example above, it will create a group within your Apple Contact list. You can set the default list to be this Daylite group. So all you have to do is scan the business card and voila, they’ll be added to Daylite as well as your Apple Contact list.
Here’s a tip for clean data entry. Let’s say you’ve gone to a trade show and scanned in a bunch of contacts. From your Mac, filter your Daylite contacts by create date to see all the new people added through the business card scanner. Then go through this list and apply the necessary Category, Keywords, extra details, or apply an Activity Set for follow ups.
8. Call a Daylite contacts using Siri
After setting up CardDAV and making Daylite the default group, any contact added in Daylite can be shared with your Apple Contacts list. So you can ask Siri to call a client, even if you’ve only added the contact in Daylite.
To start taking advantage of sharing integration with Apple Contacts & Calendars, read this help article on setting up CardDAV and read this help article on setting up CalDAV.